04.2 Node Configuration and Execution
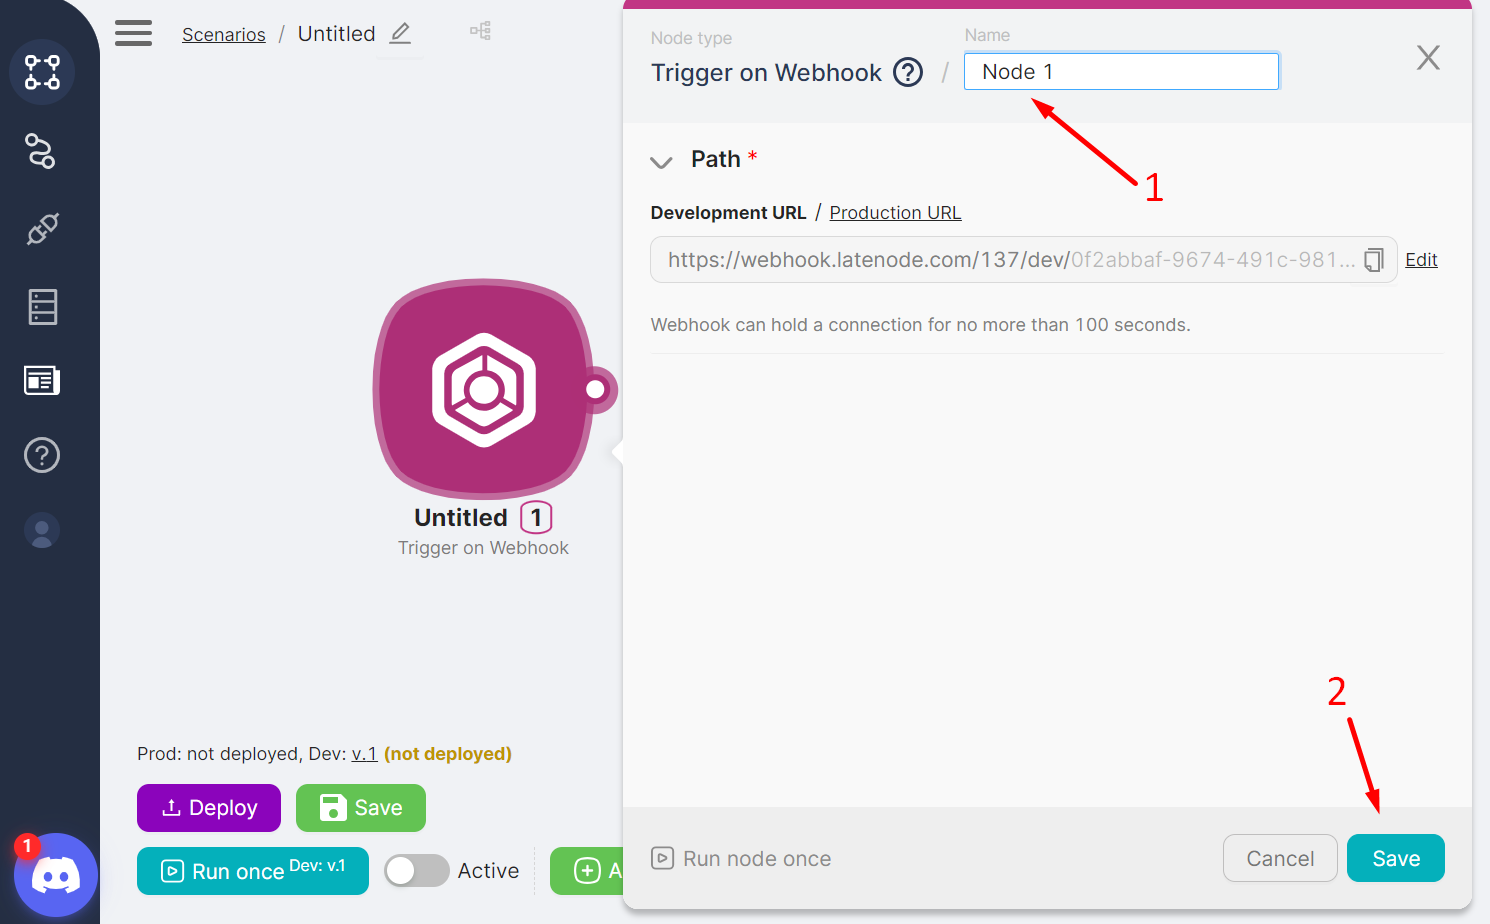
After adding a node, you can modify the node's name (1) in the settings window and save the changes by clicking the Save button (2).
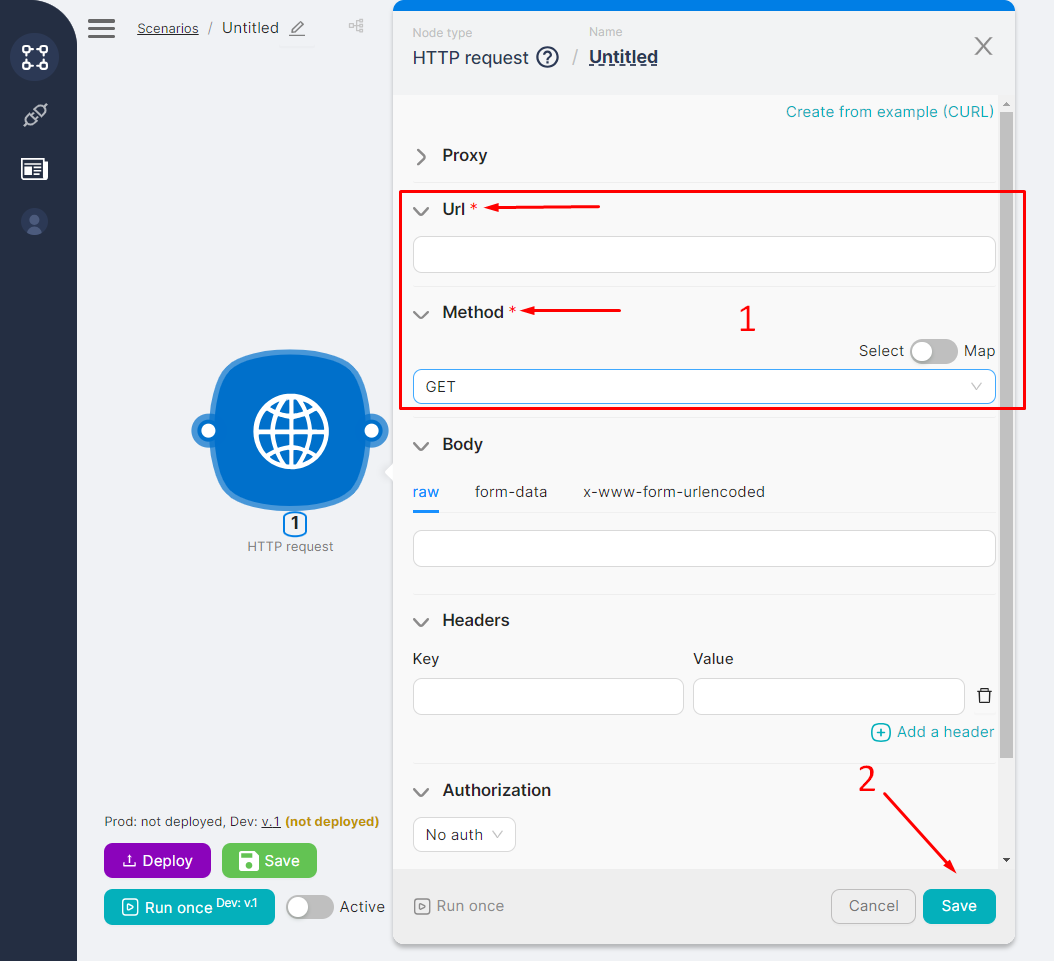
When configuring any node, you should:
- Fill in the mandatory fields (1);
caution
The set of fields for configuration is unique to each node.
- Save the settings and changes by clicking the Save button (2) in the node's configuration window.
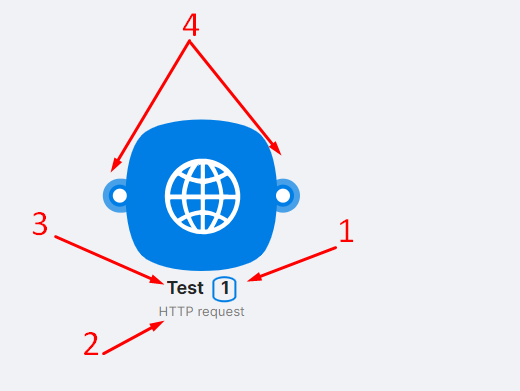
Each added and configured node is accessible for viewing on the scenario page and displays:
- (1) Node Number - a unique identifier within the scenario for the node;
- (2) Node Type - the system name of the node;
- (3) Node Name - the name entered by the user;
- (4) Route Points used to create new nodes or routes between nodes.
By right-clicking on a node, a node menu opens with the following buttons:
- (1) Settings - a button to access the node's settings;
- (2) Run Once - a button for manually running the node once. Running a node separately allows you to check its functionality without running the entire scenario;
- (3) Copy - copies the node or selected group of nodes to:
Paste the node/group content into external tools, such as Notepad;
Paste the copied node/selected group of nodes into the interface for creating/editing an existing scenario.
tip
For more details on copying, see here Copying Scenarios and Nodes
- (4) Delete - a button to delete the node.
