08.3 Creating a dynamic form for a scenario of the Nodul type
To meet business needs, it may be necessary to dynamically display fields in a scenario node of the Nodul type.
Let's create a custom node with dynamic field rendering. To do this, you need to create auxiliary scenarios with nodes such as NodulInput, NodulOutput, Nodul Form Input, Nodul Form Output, and then verify the operation of the created node.
Creating Auxiliary Scenarios
- Create a scenario of type Nodul:
- Add a NodulInput node with configured parameters:

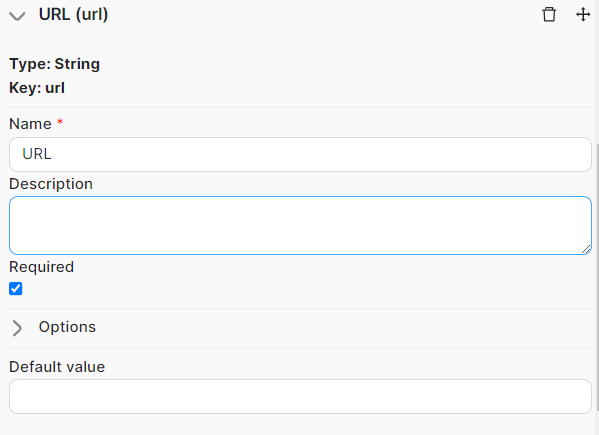
URL - a mandatory parameter of type String;
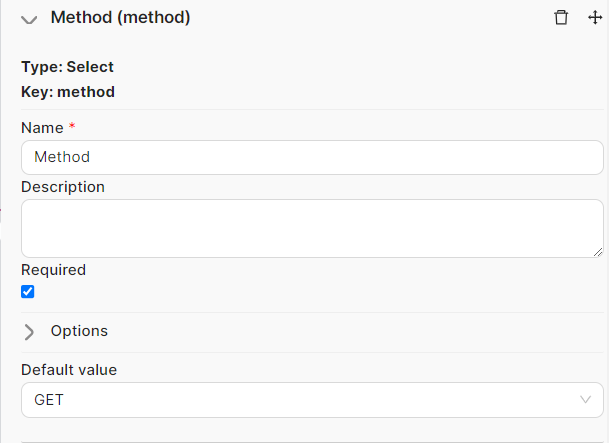
Method - a mandatory parameter of type Select with the option for a single choice and a list of values to choose from: GET, POST, PUT, DELETE. You can choose GET as the default value;
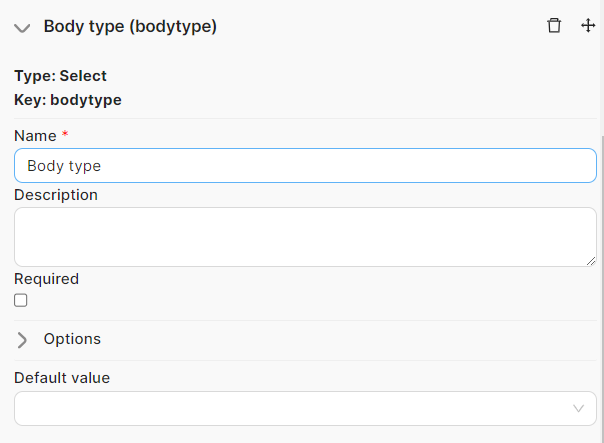
Body type - an optional parameter of type Select with the option for a single choice and a list of values to choose from: Raw, form-data, x-www-form-urlencoded. Fill in the Fetch events characteristic with the value Change to trigger the update of the entire node form when selecting a parameter value.
- Add a node to perform the scenario function, for example, an Java Script node to send requests to an external application.
- Add a NodulOutput node to receive the response from the Nodul type scenario.
- Save and activate the scenario of type Nodul;
- On the same page, create a scenario using the Nodul Form Input and Nodul Form Output nodes. This scenario will ensure dynamic display of a Nodul type scenario form based on the selected parameters:
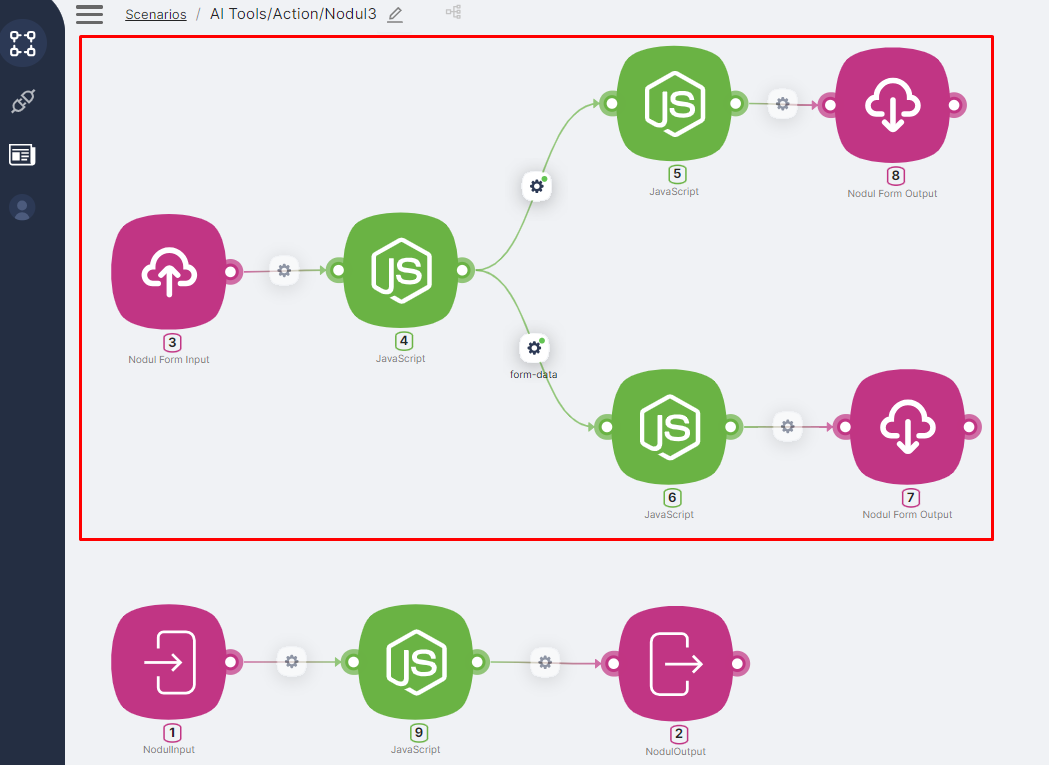
- Add a Nodul Form Input node to retrieve parameters from the Nodul type scenario form;
- Add a JavaScript node with the following code:
export default async function run({execution_id, input, data}) {
    const current_form_values = data["{{3.\`current_form_values\`}}"];
    console.log(current_form_values);
    const formValuesRaw = JSON.parse(current_form_values);
    const formValues = formValuesRaw.reduce((acc, item) => {
        acc[item.key] = item.type === 'select' ? {
            ...item,
            value: {
                select: item.value.select[0],
            }
        } : item;
        return acc;
    }, {});
    const changedKeys = JSON.parse(data["{{3.event.\`param_keys\`}}"]).reduce((acc, item) => {
        acc[item] = true;
        return acc;
    }, {});

    return {
        formValues,
        changedKeys,
    }
}
- Create a connection with the condition
{{4.changedKeys.bodytype = true and 4.formValues.bodytype.value.select = "raw"}}to trigger the corresponding branch of the scenario when the "Raw" value is selected in the Body type parameter;
- Add another JavaScript node with the following code:
export default async function run({execution_id, input, data}) {
    return {
        data: {
            params: {
                set: [{
                    key: 'body',
                    type: 'text',
                    title: 'Row',
                    required: true,

                }]
            }
        }
    }
}
- Add a Nodul Form Output node to display form parameters after selecting "Raw" in the Body type parameter;
- Create a connection with the condition
{{4.changedKeys.bodytype = true and (4.formValues.bodytype.value.select = "form-data" or 4.formValues.bodytype.value.select = "x-www-form-urlencoded")}}to trigger the corresponding branch of the scenario when "form-data" or "x-www-form-urlencoded" values are selected in the Body type parameter;
- Add another JavaScript node with the following code:
export default async function run({execution_id, input, data}) {
    return {
        data: {
            params: {
                set: [{
                    key: 'body',
                    type: 'string_to_string',
                    title: data["{{4.\`formValues\`.bodytype.value.select}}"],
                }]
            }
        }
    }
}
- Add a Nodul Form Output node to display form parameters after selecting "Raw" in the Body type parameter.
The result of auxiliary scenarios
To check the result of the created scenarios, you need to:
- Create a new scenario;
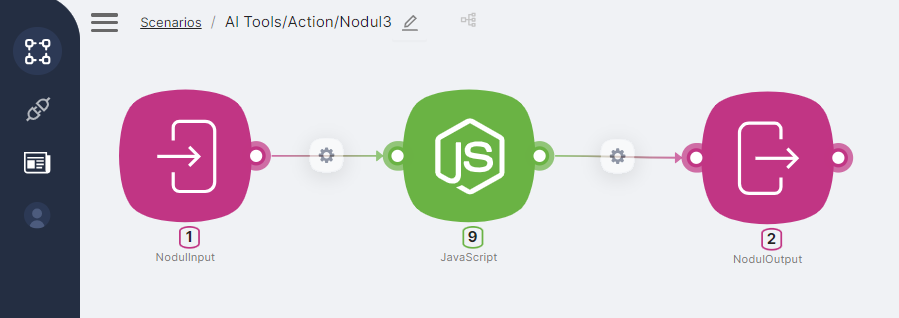
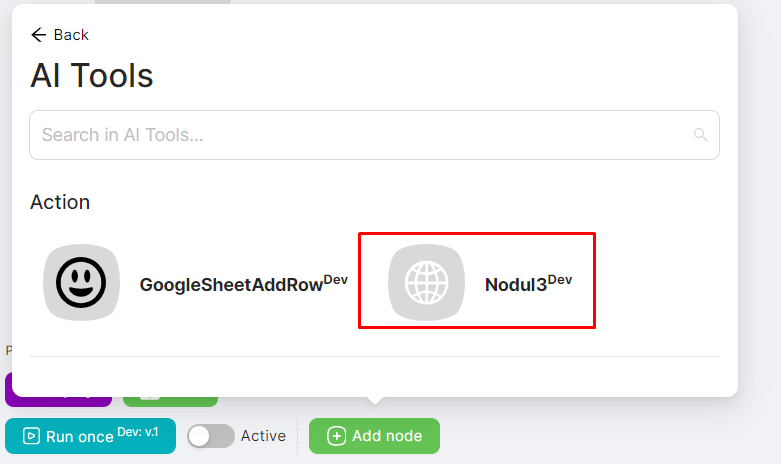
- Add the created node using the Add Node button. The node will be placed in the node group according to the scenario name, under the Nodul type.
For example, if the scenario name is Al Tools/Action/Nodul3 then the node will be placed in the Al Tools group, under the Action subgroup, and named Nodul3.
- The added node will display fields corresponding to the parameters of the NodulInput node:
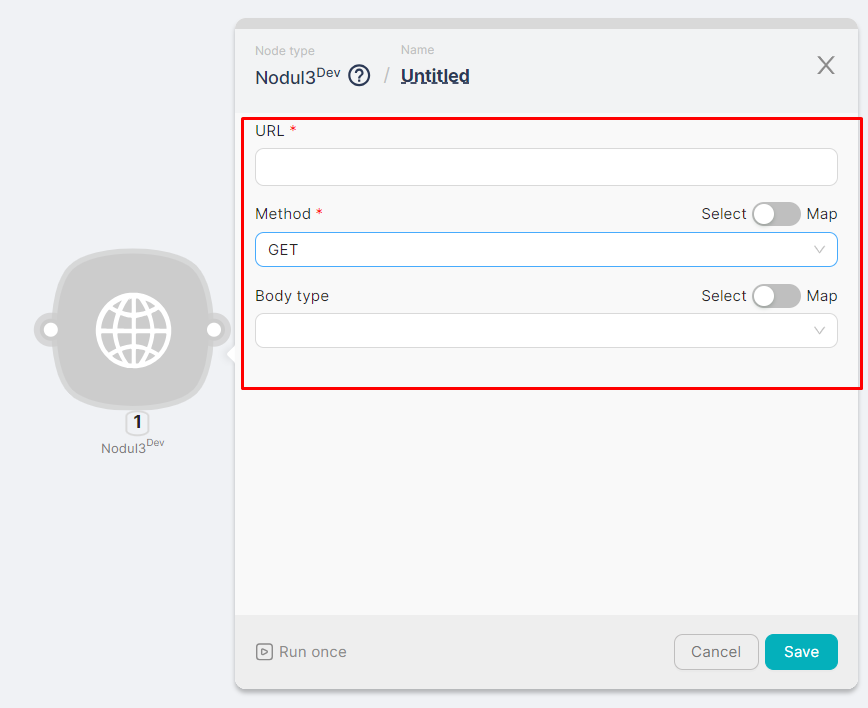
- When selecting the "Raw" parameter in the Body type field, the node's form will be updated, and a mandatory Row field will be added to the existing fields;

- When selecting the "form-data" or "x-www-form-urlencoded" parameter in the Body type field, the node's form will be updated, and pairs of Key-Value fields will be added to the existing fields.

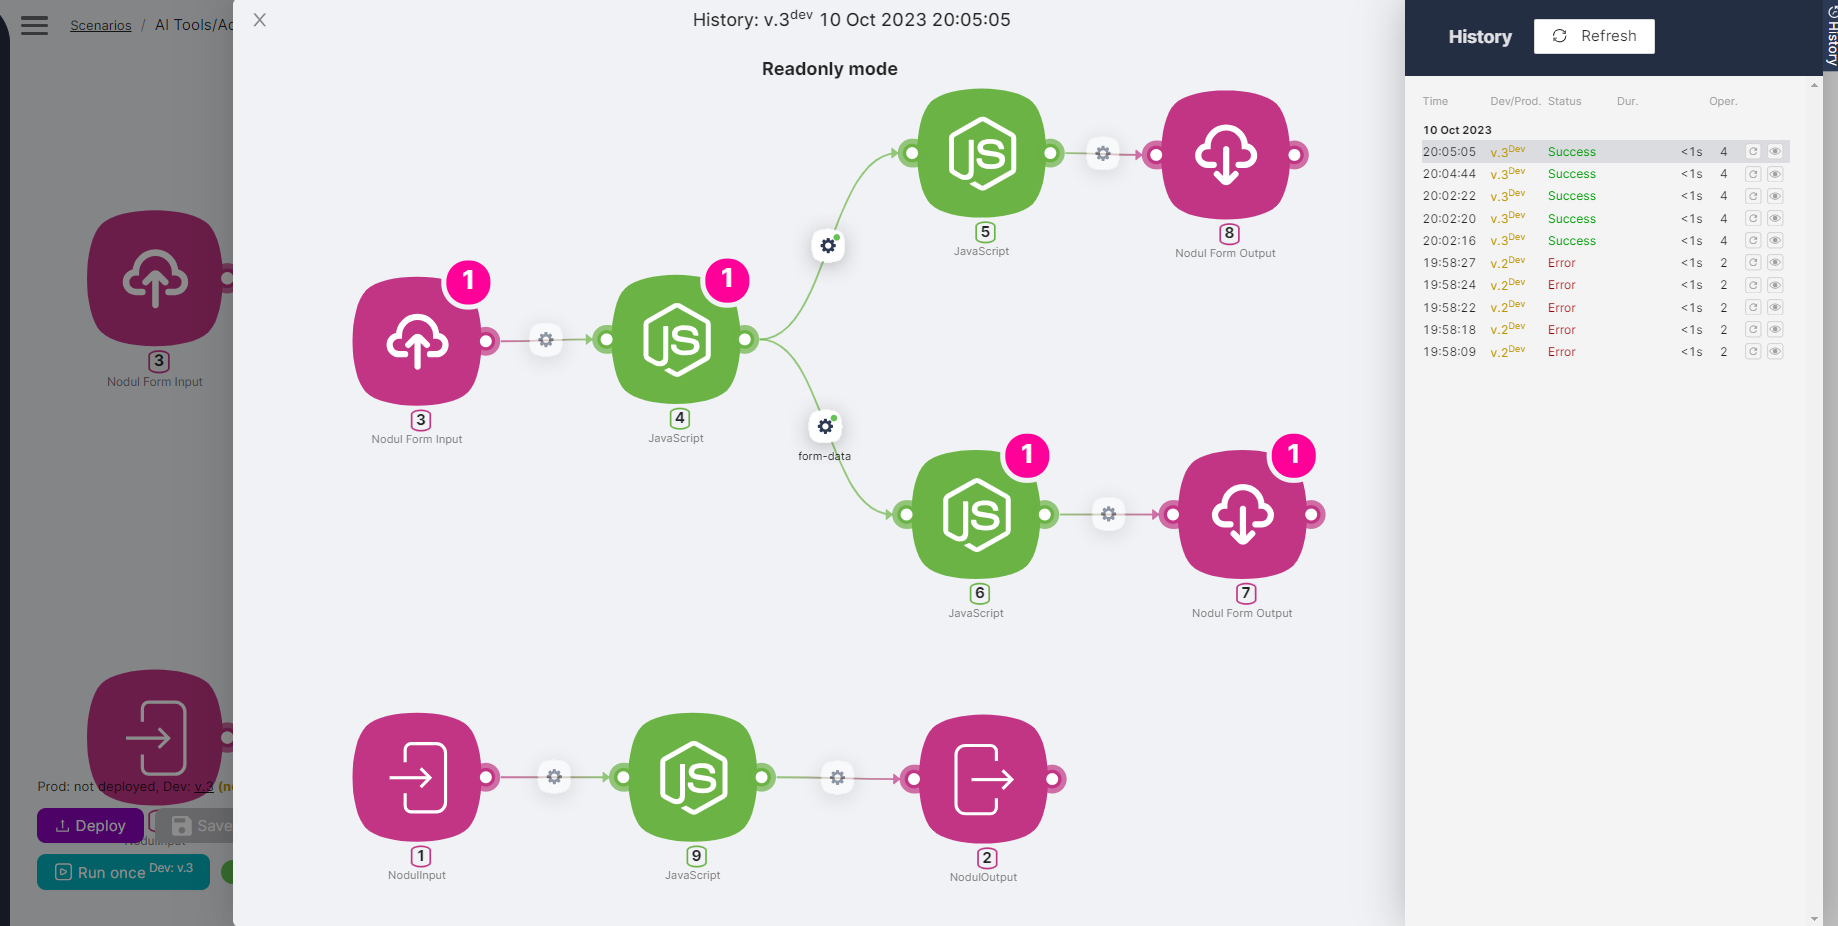
- Each time the node is updated, an auxiliary scenario is triggered. The history and results of the execution are displayed in the History section on the scenario page.