04.5.10 Framer
The Latenode platform allows interaction with websites created using the Framer service. For interaction, only the Trigger on Webhook node is needed.
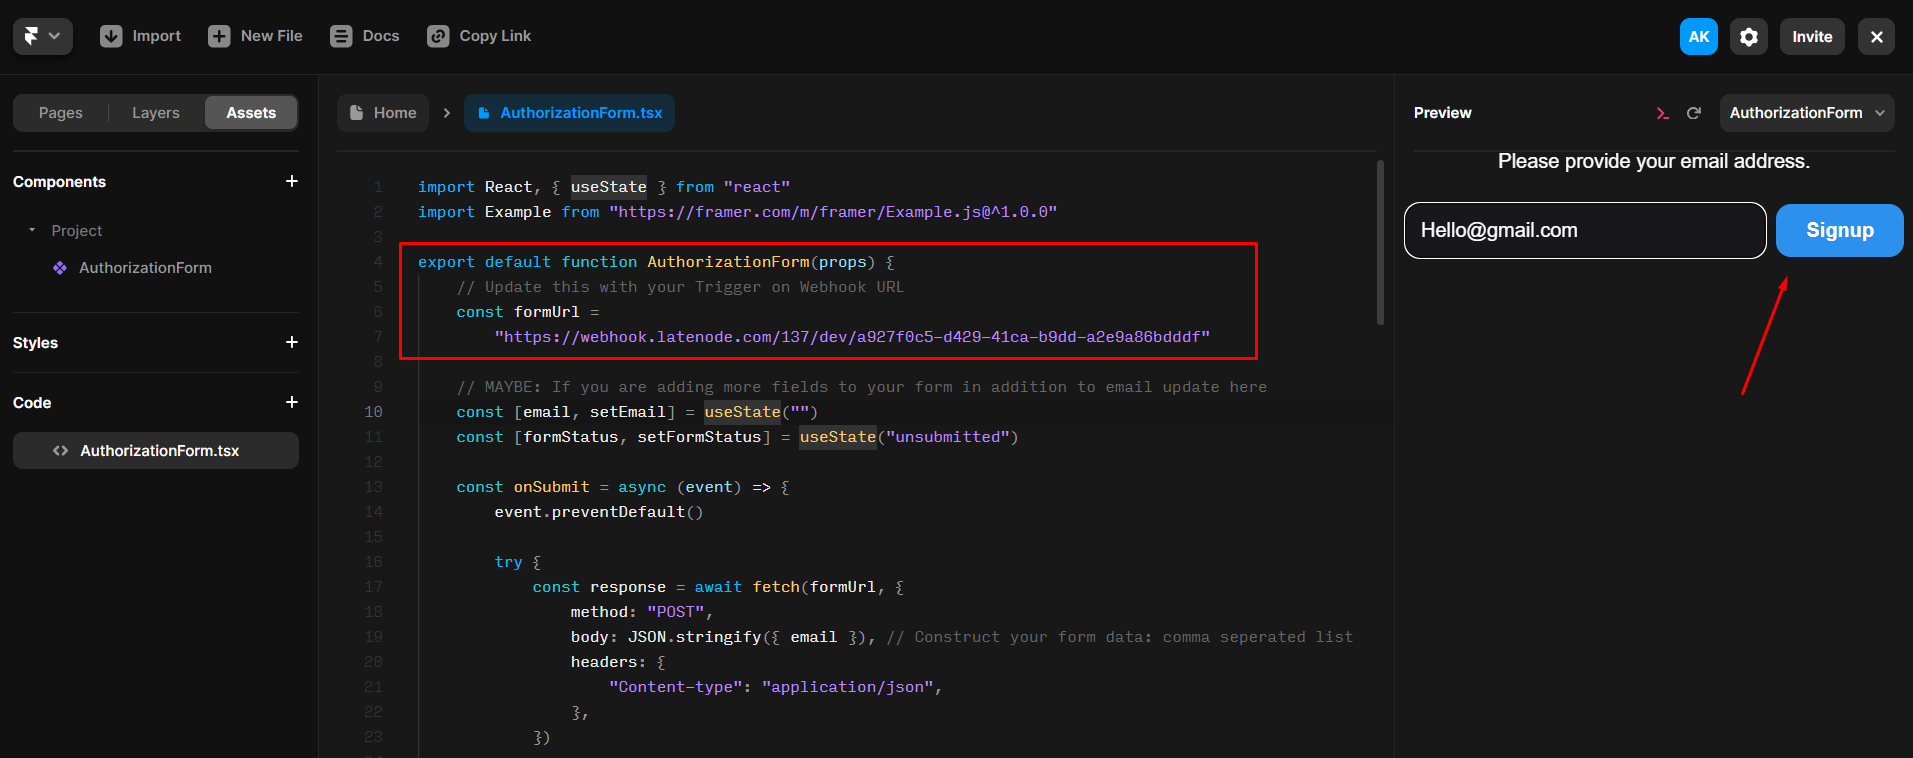
Let's create a scenario that records the email address entered in a website form into a Google Sheet. First, use the Framer service to create the registration form with a field for entering the email address and a confirmation button.
Creating a Framer Form
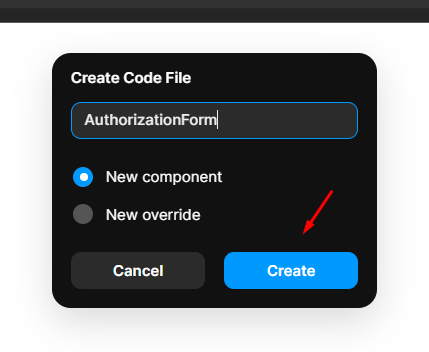
- In the Framer workspace, choose the method to add a Code element. In the Create Code File window, enter any name and select the New component option.
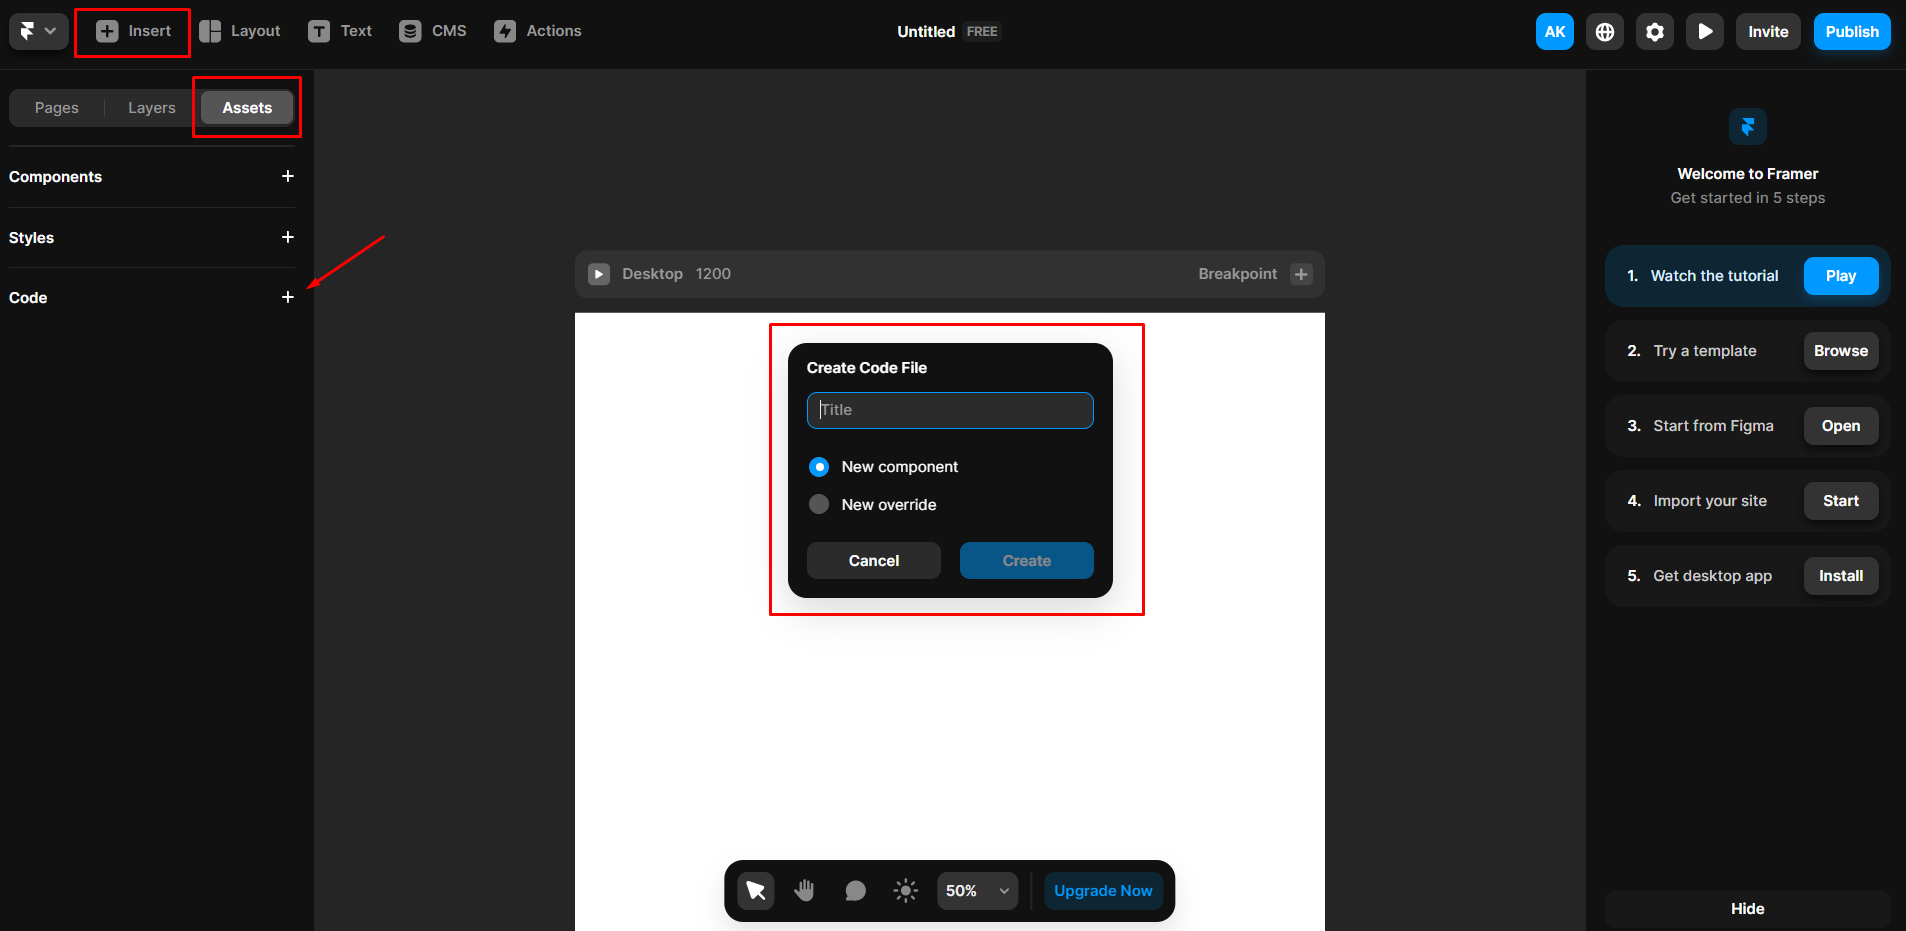
- Click the Create button.
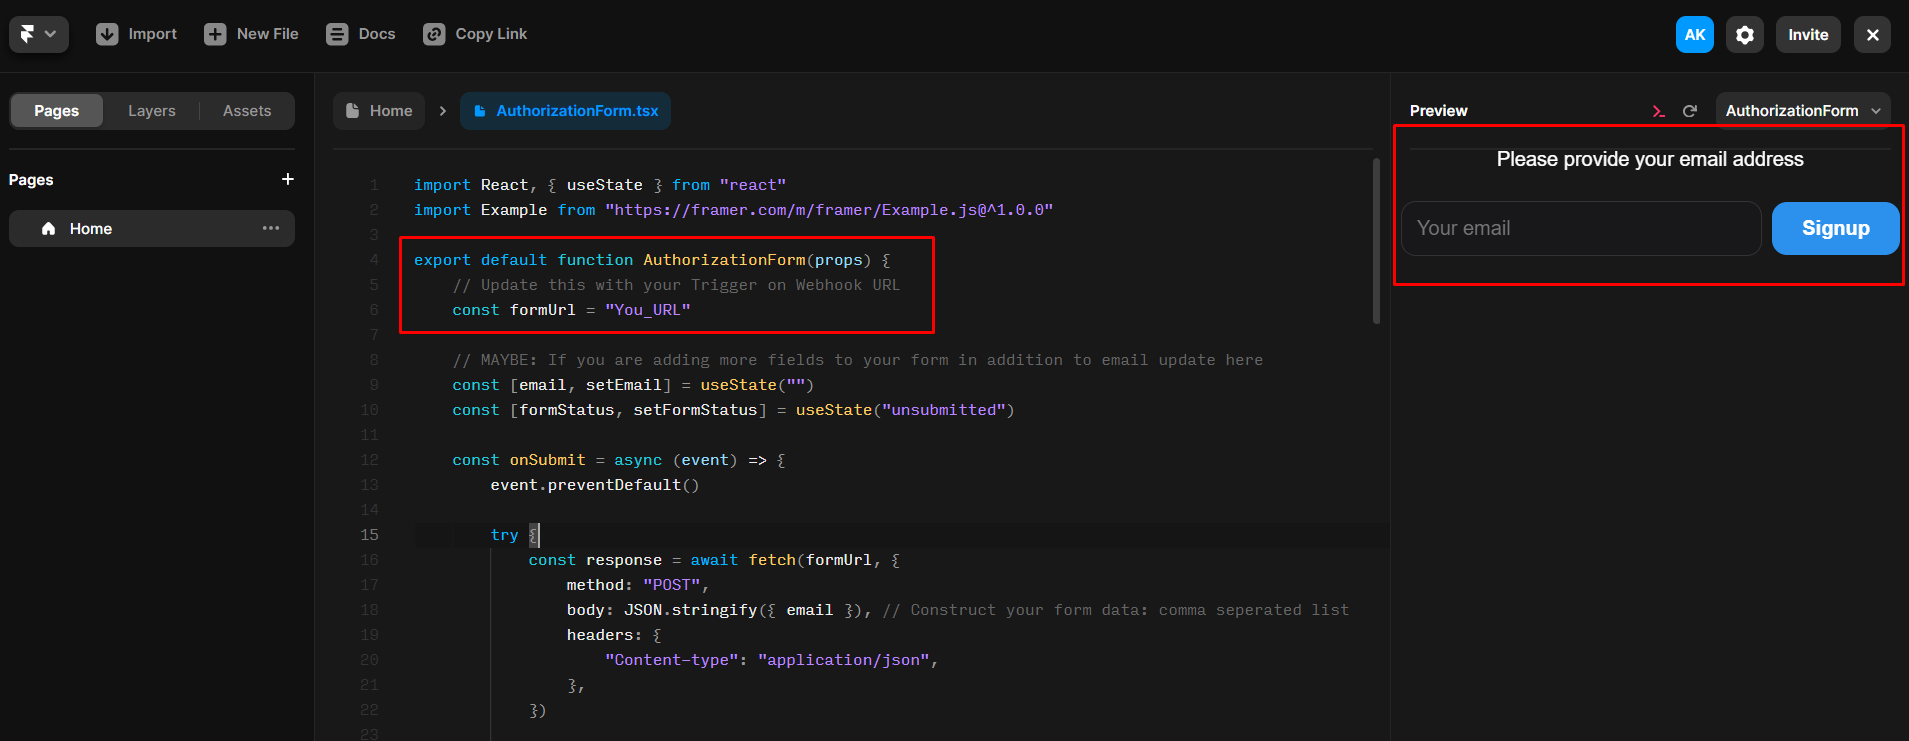
- On the opened page, add the code below and save the changes by pressing Ctrl + S. The form with an email input field and a Signup button will appear on the right side of the interface.
import React, { useState } from "react"
import Example from "https://framer.com/m/framer/Example.js@^1.0.0"

export default function AuthorizationForm(props) {
    // Update this with your Trigger on Webhook URL
    const formUrl =
        "You_URL"

    // MAYBE: If you are adding more fields to your form in addition to email update here
    const [email, setEmail] = useState("")
    const [formStatus, setFormStatus] = useState("unsubmitted")

    const onSubmit = async (event) => {
        event.preventDefault()

        try {
            const response = await fetch(formUrl, {
                method: "POST",
                body: JSON.stringify({ email }), // Construct your form data: comma seperated list
                headers: {
                    "Content-type": "application/json",
                },
            })

            if (!response.ok) {
                throw new Error("Network response was not ok")
            }

            setFormStatus("submitted") // Update state to indicate successful submission
        } catch (error) {
            console.error("Error during form submission: ", error)
            setFormStatus("error") // Update state to indicate an error
        }
    }

    // Function to update email state
    // MAYBE: If you are adding more fields to your form in addition to email update here
    const handleEmailChange = (event) => {
        setEmail(event.target.value)
    }

    if (formStatus === "submitted") {
        return (
            <div style={responseText}>
                Thank you! You have successfully registered.
            </div>
        )
    }

    if (formStatus === "error") {
        return <div>Something went wrong. Please refresh and try again!</div>
    }
    return (
        <>
            {/* Label for the form */}
            <div style={labelStyle}>Please provide your email address.</div>
            {/* Form */}
            <form onSubmit={onSubmit} style={containerStyle}>
                <input
                    type="email"
                    value={email}
                    onChange={handleEmailChange}
                    placeholder="Your email"
                    required
                    style={inputStyle}
                />
                <input type="submit" value="Signup" style={submitButtonStyle} />
            </form>
        </>
    )
}
/// Updated Form Styles to match the provided image

// Assuming a dark theme similar to the one in the image
const containerStyle = {
    display: "flex", // Changed from flexDirection to display for correct CSS
    justifyContent: "space-between", // Align items side-by-side
    alignItems: "center",
    //background: "#18181B", // Dark background
    padding: "0.5rem", // Reduced padding
    borderRadius: "4px", // Smaller border radius for a subtler curve
    // boxShadow: "0 4px 8px rgba(0, 0, 0, 0.1)", // A subtle shadow
    maxWidth: "500px", // Max width for the form
    margin: "auto", // Center the form in the page
}

const inputStyle = {
    flex: "1", // Take up the remaining space
    fontSize: "16px", // Smaller font size
    padding: "0.75rem", // Comfortable padding
    margin: "0", // No margin for the input
    backgroundColor: "#18181B", // Background to match the container
    border: "1px solid #333", // Subtle border
    borderRadius: "12px", // Matching the container's border radius
    color: "#FFF", // Text color
    marginRight: "0.5rem", // Space between input and button
}

const submitButtonStyle = {
    fontSize: "16px", // Matching font size with the input
    padding: "0.75rem 1.5rem", // Padding similar to the input
    backgroundColor: "#2C91ED", // Bright accent color for the button
    color: "#FFF", // Text color
    border: "none", // No border
    borderRadius: "12px", // Matching the container's border radius
    cursor: "pointer", // Cursor for button
    fontWeight: "bold", // Bold font weight for the button text
}

const responseText = {
    textAlign: "center", // Center the response text
    color: "#5FCEAE", // Color for the response message
    fontSize: "16px", // Consistent font size
    marginTop: "1rem", // Space above the response text
}

const labelStyle = {
    textAlign: "center", // Center align text
    color: "#FFF", // Text color
    fontSize: "16px", // Font size
    marginBottom: "1rem", // Space below the label
}
Setting Up the Latenode Scenario and Sending Email
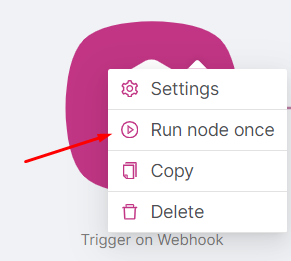
- In the scenario created on the platform, add a Trigger on Webhook node. After adding, copy the URL address. You can run the node once to view the output data.
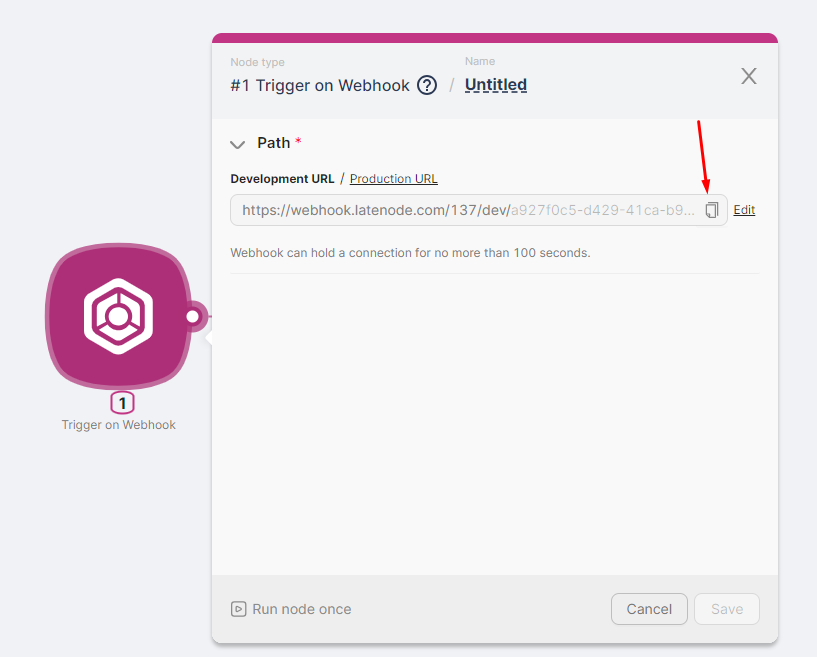
- Replace
You_URLin the Framer form code with the URL address of the Trigger on Webhook node.
Remember, the Production-branch of the scenario is initiated by a request sent to the Production-version URL of the Trigger on Webhook node. The Development-branch of the scenario is initiated by a request sent to the Development-version URL of the Trigger on Webhook node.
- After adding the URL address, fill in the field with a test email address and click the Signup button.
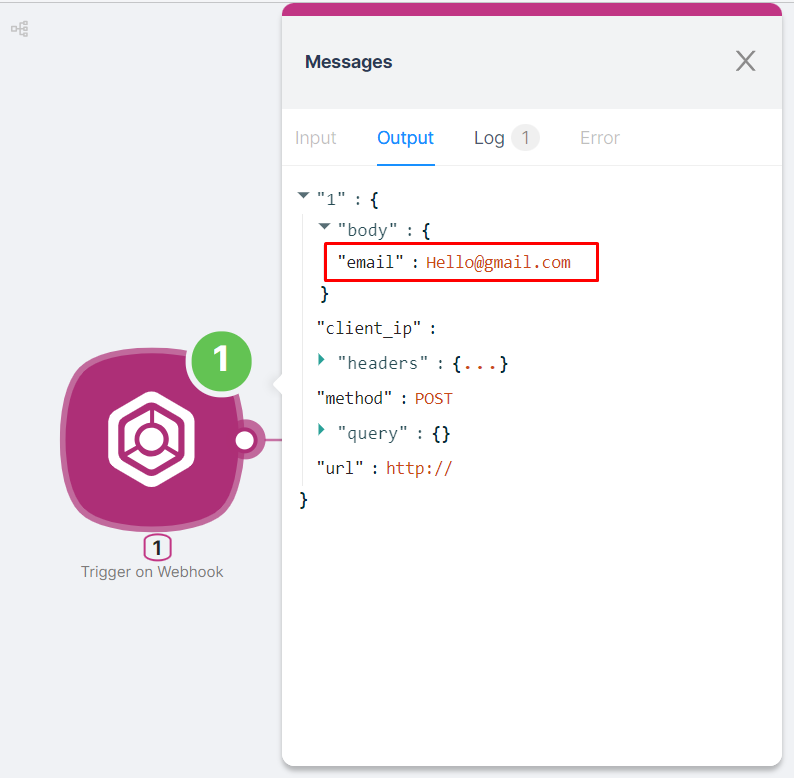
- Once you click the Signup button, the Trigger on Webhook node will execute, and the output data will include the provided email address.
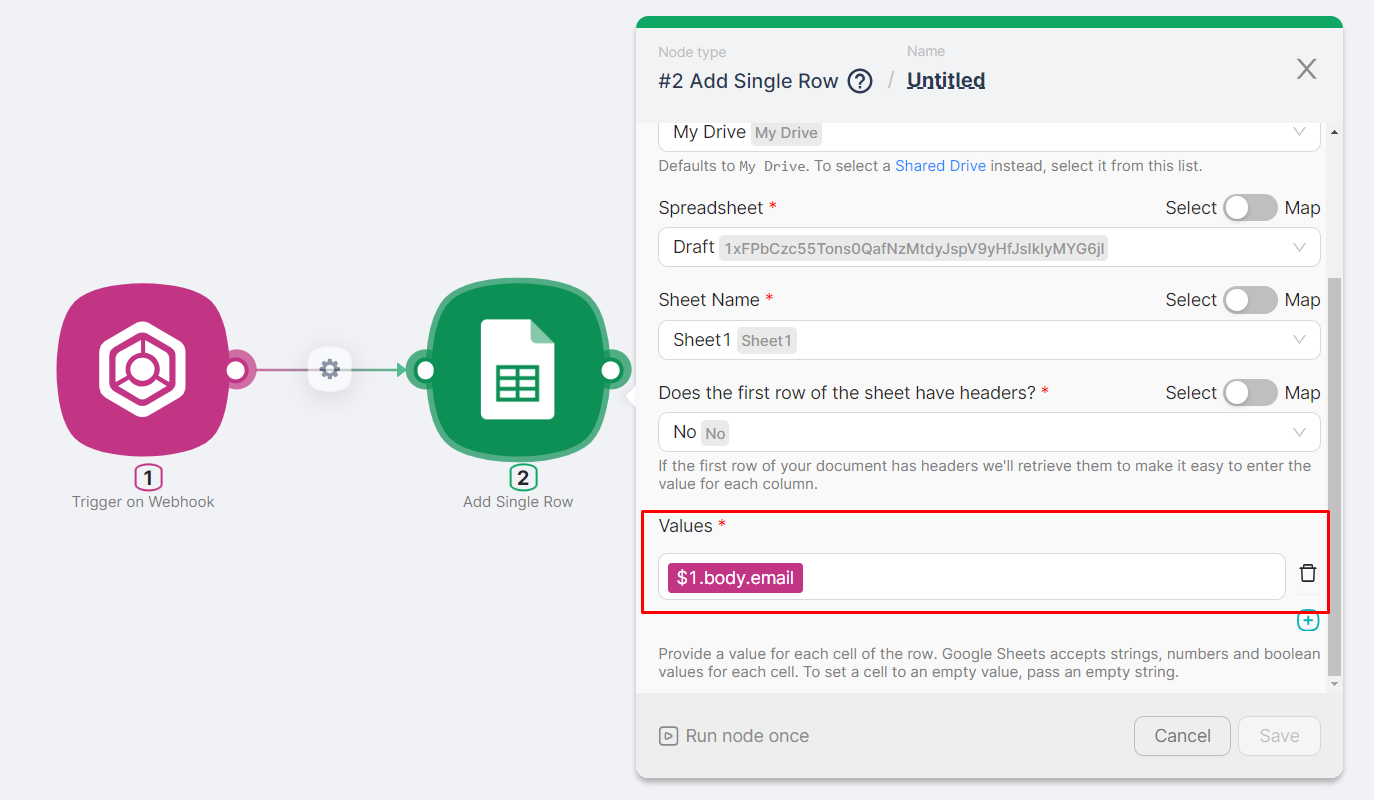
- To record the received email address in a Google Sheet, add an Add Single Row node and configure it:
- Create or select an existing authorization.
- Choose the desired Google Sheet and sheet tab.
- Select the parameter from the previous node for the Values field in the auxiliary window.
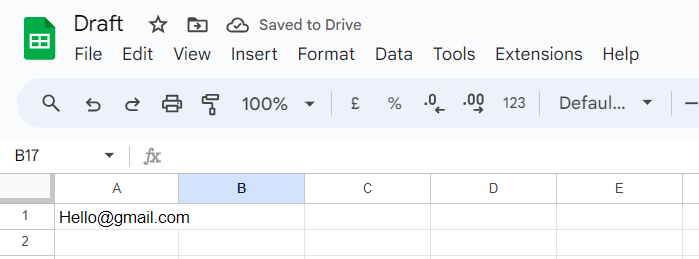
The result of the scenario execution is that the email address entered in the Framer form is recorded in a cell of the Google Sheet.