03.01 Node.js
The JavaScript node allows you to write and execute JavaScript code, import npm libraries, and handle various data processing tasks. This node provides robust support for integrating custom code into workflows, enhancing the flexibility and functionality of your scenarios.
Adding Code to a Scenario
To add code to a scenario, follow these steps:
- Click on one of the buttons to add a node.
- In the application selection window, choose the JavaScript node.
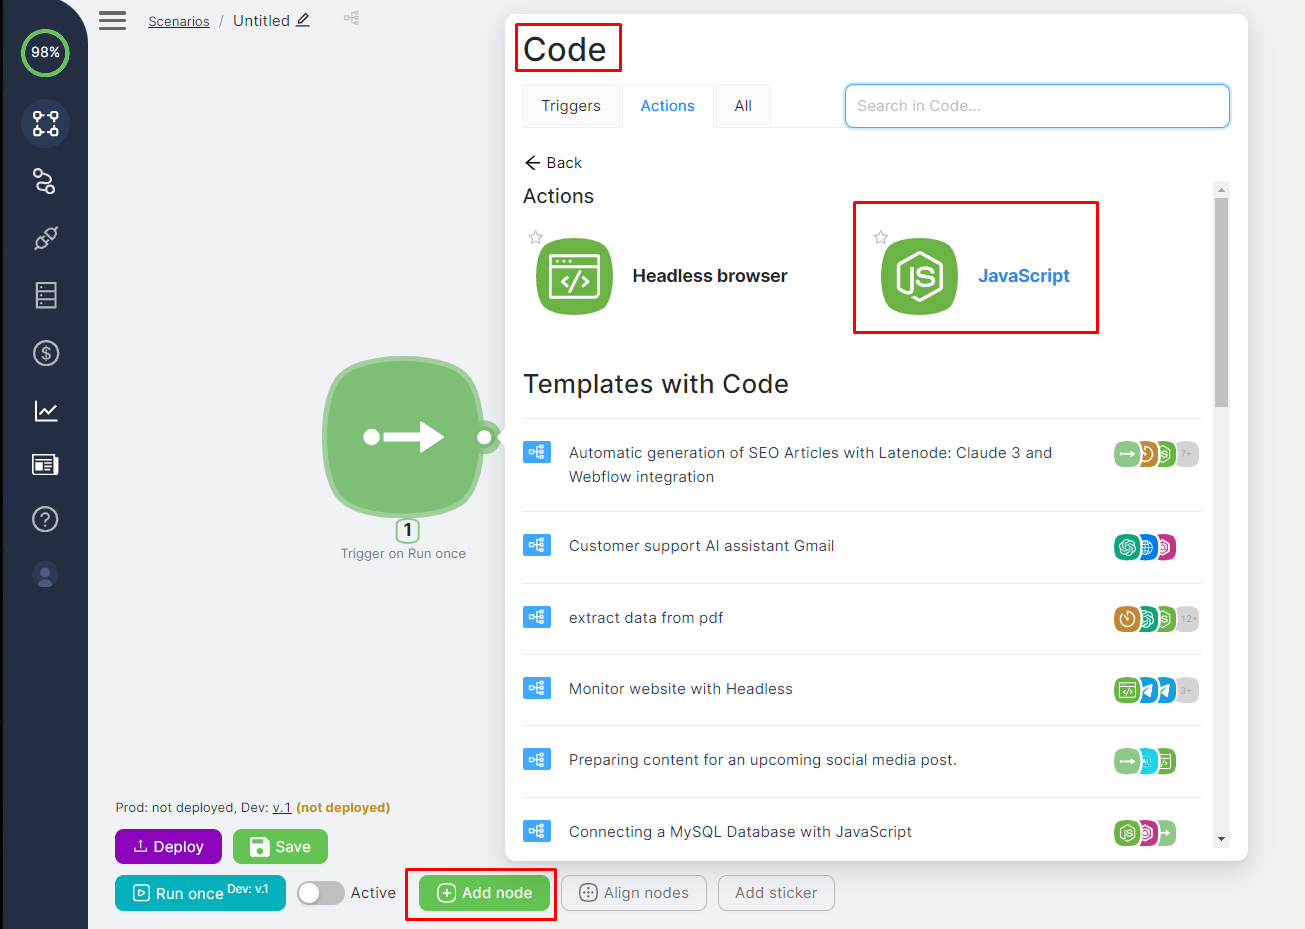
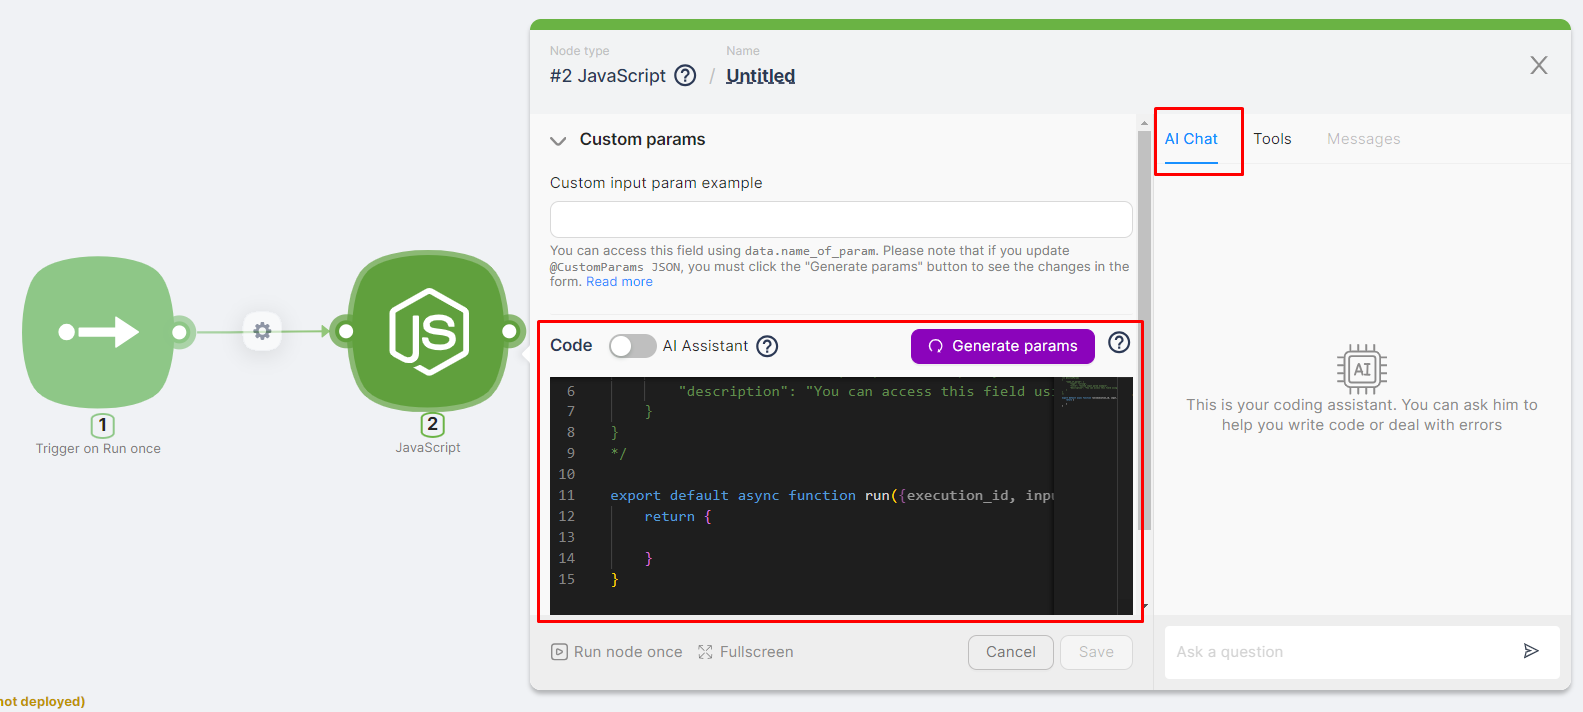
- Open the added JavaScript node and make changes to the code template manually or with the help of the AI assistant.
Data Exchange Between Nodes
Using Data from Previous Nodes in Code
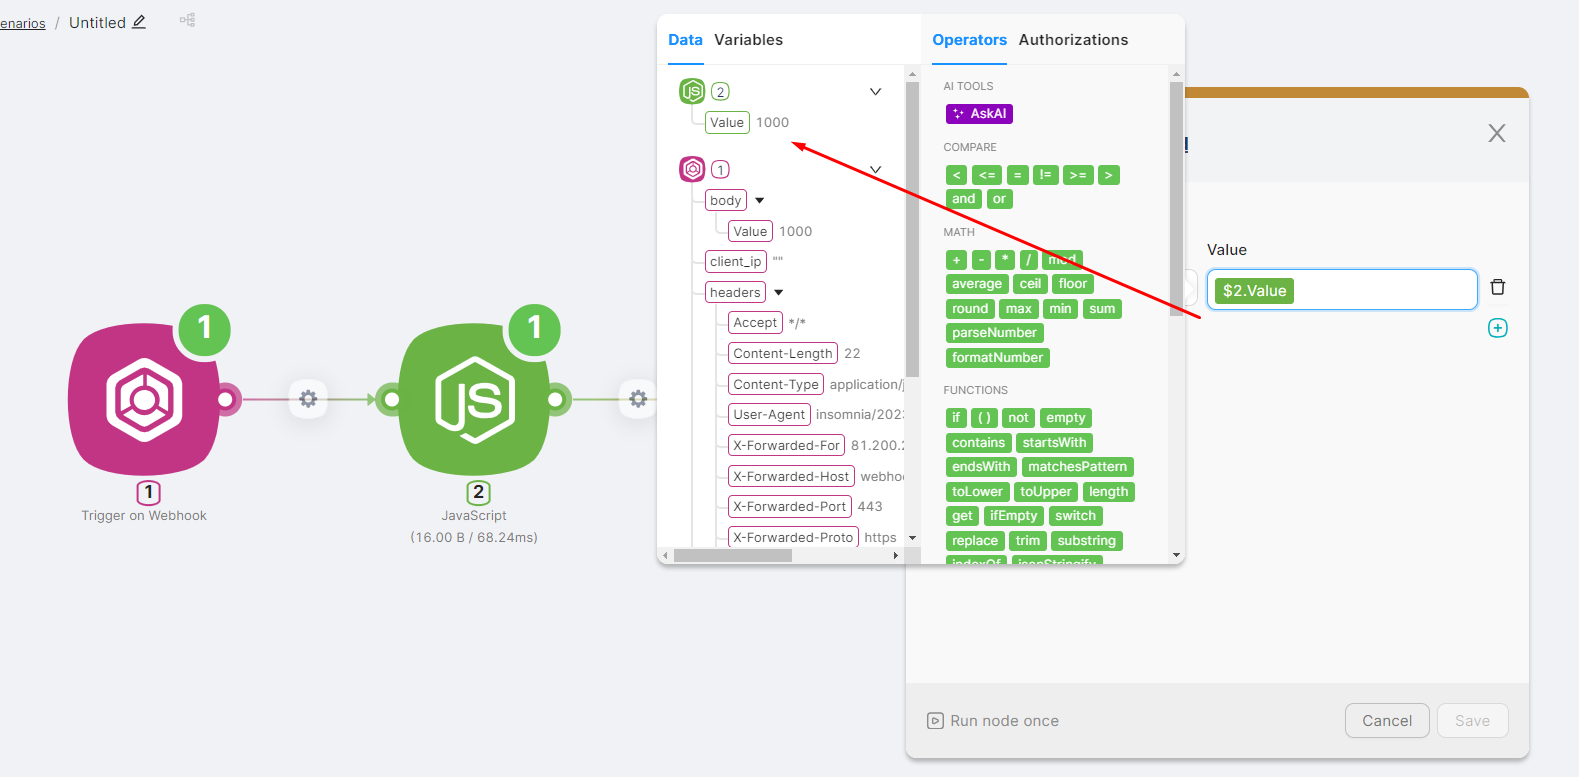
The code generated in the JavaScript node can utilize the output data from previous nodes in the scenario. For example, in a JavaScript node, you can reference a parameter passed to the Trigger on Webhook node via an HTTP request. To do this, follow these steps:
- Write an expression to define a constant using
const =.
- Select the necessary parameter from the previous nodes.
By doing so, you can seamlessly integrate and manipulate data across different nodes within your scenario.
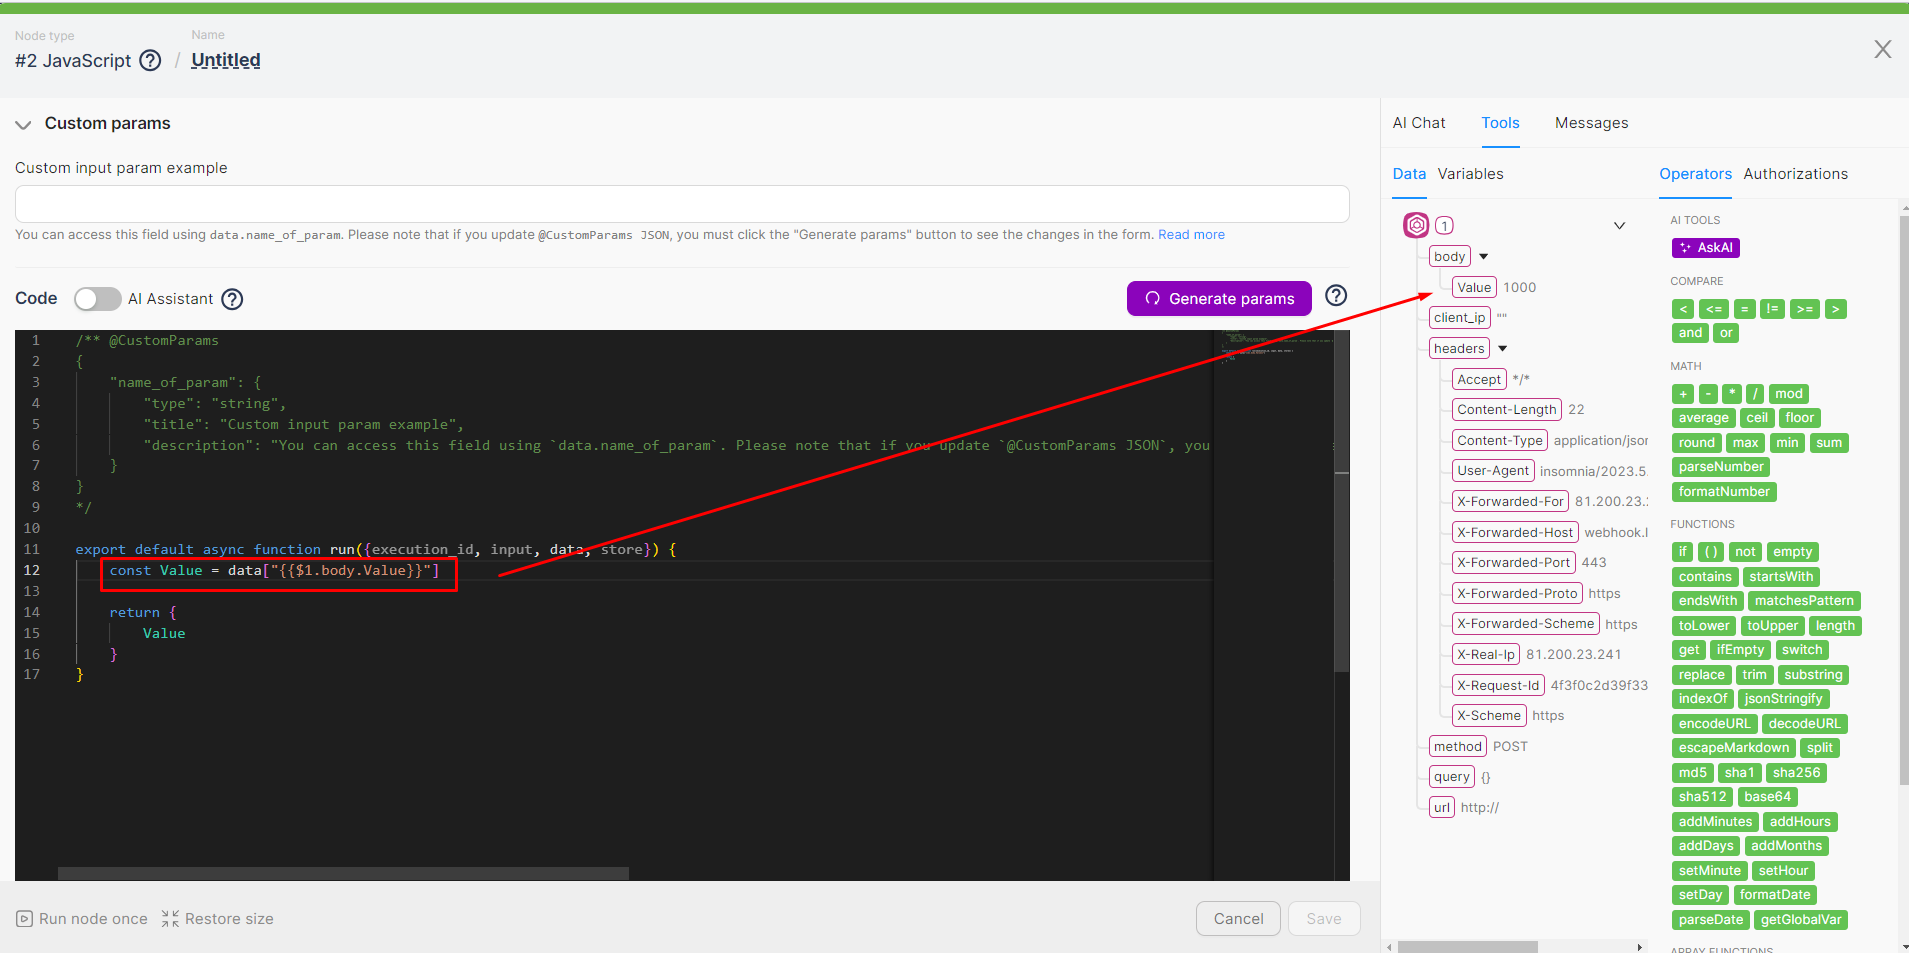
When adding data from other nodes, part of the expression may be wrapped in backticks. For example: data["{{1.headers.Content-Type}}"], even if another node returned the property without them. It is not necessary to remove the backticks, as they will be ignored during code execution. Removing them manually may result in code execution errors.
Passing Processed Data to Subsequent Nodes
The result of the JavaScript node can be a string, numerical value, JSON object, etc. The output data from the JavaScript node can also be used in other nodes within the scenario. For example, a parameter generated in the JavaScript node can be recorded as a variable. To do this:
- In the SetVariables node, click on the Value field.
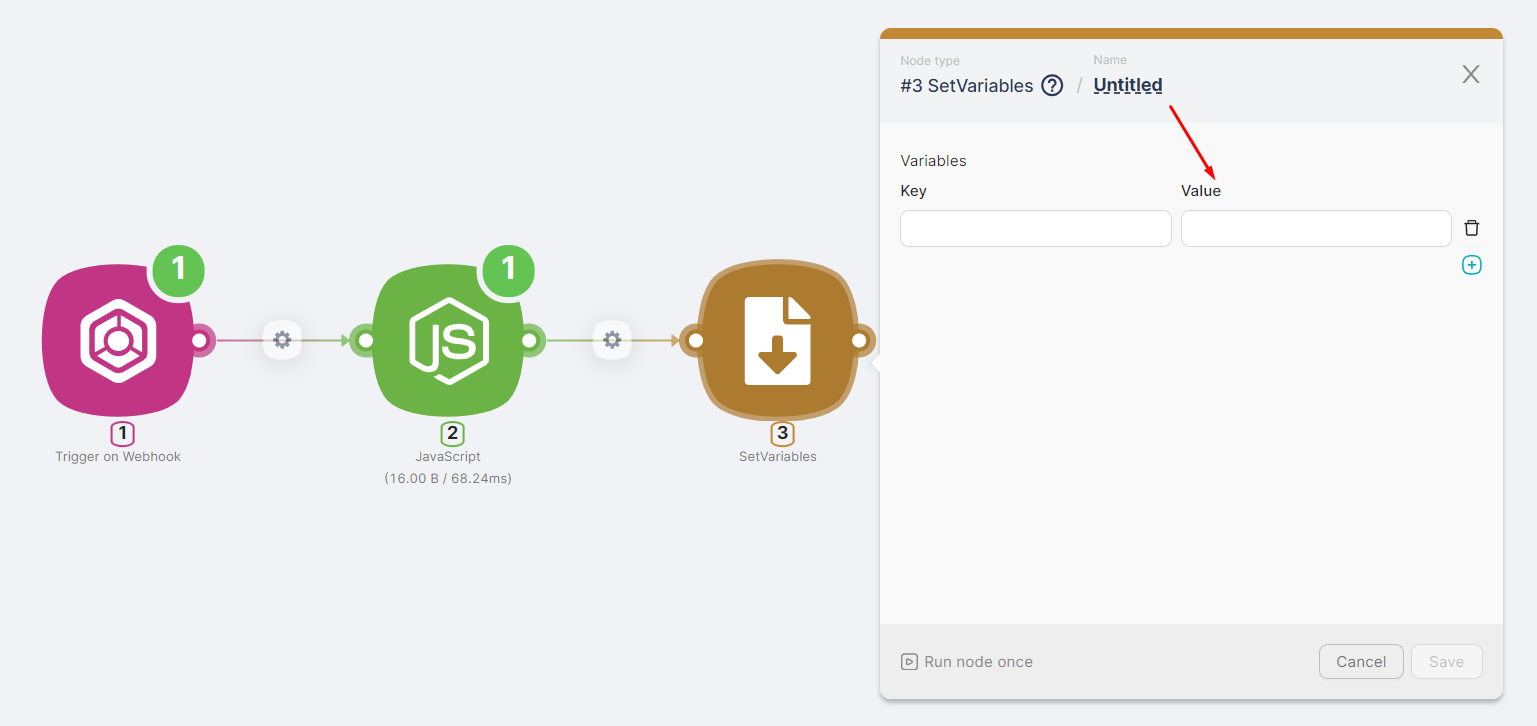
- In the auxiliary window, select the parameter generated in the JavaScript node.
This way, you can efficiently pass and utilize processed data between nodes in your workflow.
Using Variables
Variables created within the scenario or global variables can also be used in the JavaScript node.
Processing Files or Arrays of Files
The JavaScript node can be used to process files or arrays of files sent to the scenario, for example, by sending a request to the Trigger on Webhook node.
async function run({execution_id, input, data, page}) {
  const file = data["{{2.body.files.[].content}}"];
}
Even when sending a single file, it is recognized as an array of files. Therefore, you need to specify its index:
async function run({execution_id, input, data, page}) {
  const file = data["{{2.body.files.[0].content}}"];
}
As a result, the constant file will be assigned the path to the file, which can be used, for example, to upload files into a specific form:
async function run({execution_id, input, data, page}) {
  const file = data["{{2.body.files.[0].content}}"];
  await (await page.$x('//*/input[@type="file"]'))[0].uploadFile(file);
}
To iterate through an array of files with a known length, for example, 5, write the following code:
async function run({execution_id, input, data, page}) {
  const files = [
    data["{{2.body.files.[0].content}}"],
    data["{{2.body.files.[1].content}}"],
    data["{{2.body.files.[2].content}}"],
    data["{{2.body.files.[3].content}}"],
    data["{{2.body.files.[4].content}}"]
  ].filter(file => file && file !== 'null');

  const uploadForm = await page.$x('//*/input[@type="file"]')[0];
  for (let file of files) {
      await uploadForm.uploadFile(file);
  }
}
Return files from javascript
In a JavaScript node, you can create and edit files in the filesystem using, for example, the fs package. To return files from the node, you can use the following functions:
- file(filePath) — returns a single file from the specified path. The filePath parameter must be a string.
- files(filePaths) — returns an array of files from the specified paths. The filePaths parameter must be an array of strings.
Important: These functions only work at the first level of nesting in the returned data from the node.
Example code:
import fs from 'fs';
export default async function run({execution_id, input, data, store, db}) {
    fs.writeFileSync('file1.txt', 'some file content 1');
    fs.writeFileSync('file2.txt', 'some file content 2');
    fs.writeFileSync('file3.txt', 'some file content 3');
    return {
        file: file('file1.txt'),
        files: files(['file2.txt', 'file3.txt'])
    }
}
This will not work (functions file/files are deeper than the first level of nesting):
import fs from 'fs';
export default async function run({execution_id, input, data, store, db}) {
    fs.writeFileSync('file1.txt', 'some file content 1');
    fs.writeFileSync('file2.txt', 'some file content 2');
    fs.writeFileSync('file3.txt', 'some file content 3');
    return {
        object: {
            file: file('file1.txt'),
            files: files(['file2.txt', 'file3.txt'])
        }
    }
}
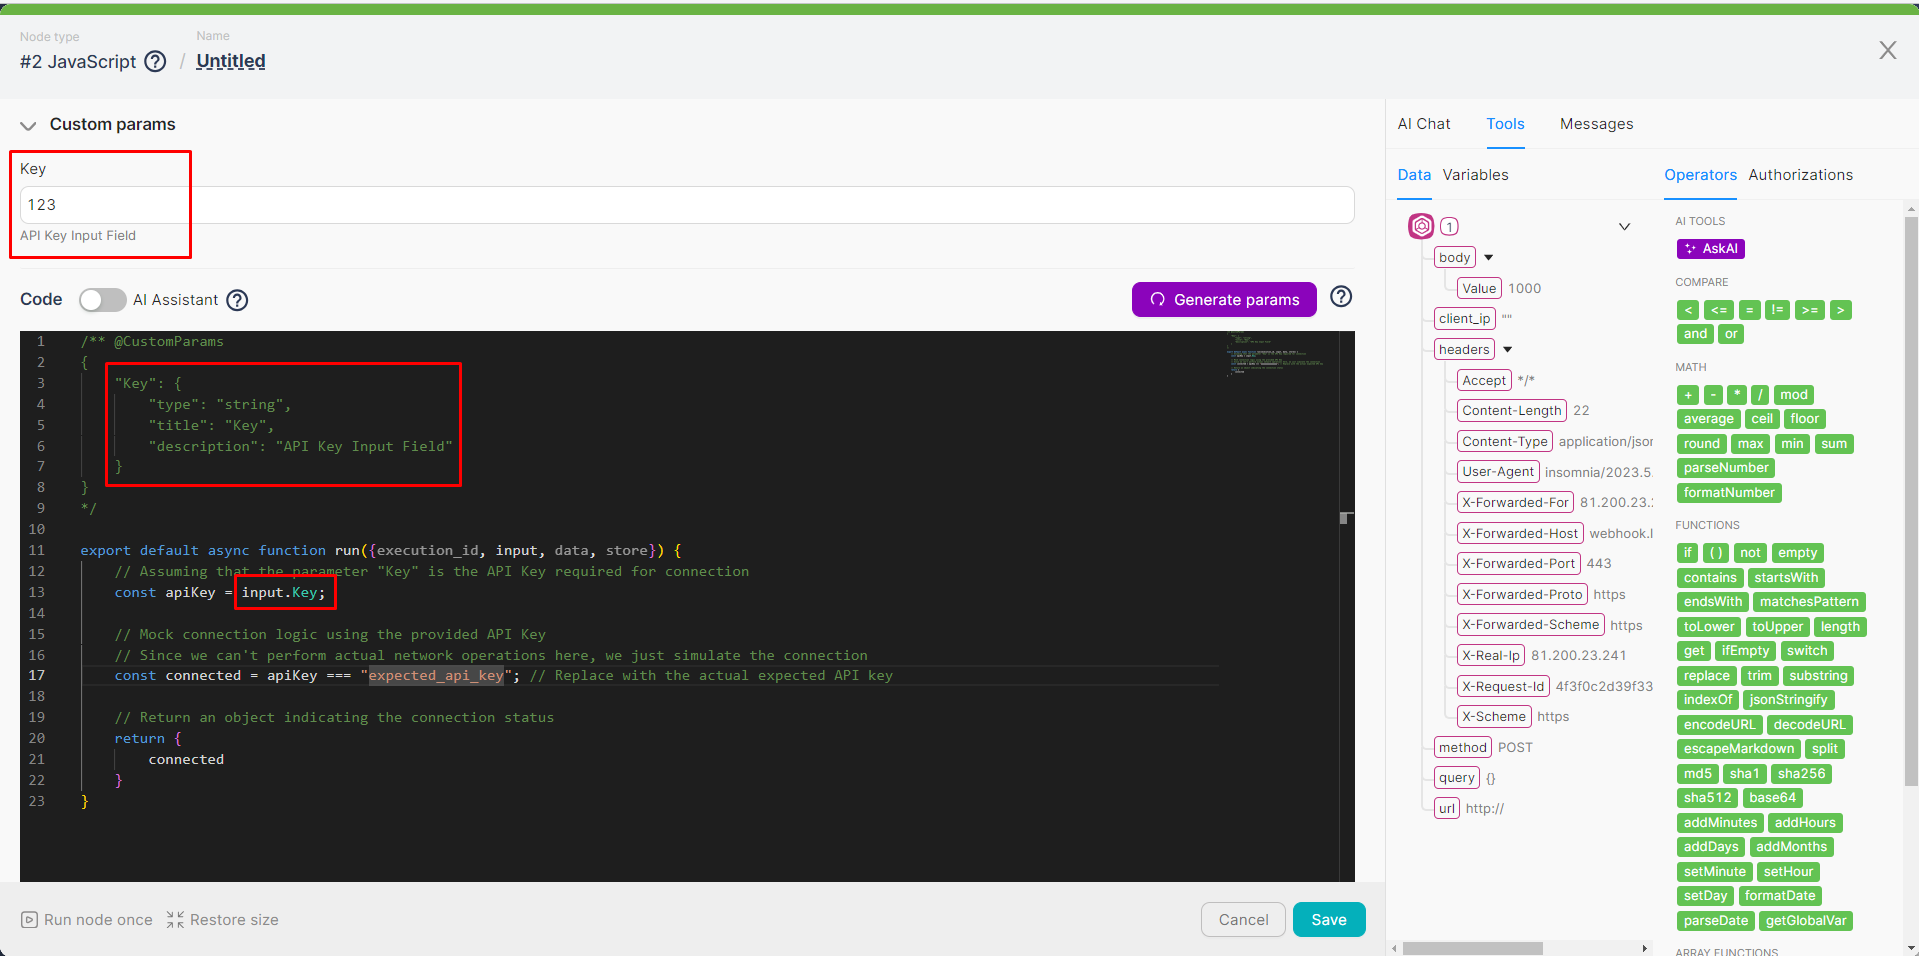
Custom Parameters in JavaScript
Custom parameters in the JavaScript node allow you to externalize certain parts of the code into special input fields, eliminating the need to edit the code itself.
For example, if your code uses an API key, you can generate a separate input field for this parameter in the JavaScript node. This way, you only need to change the value in the designated field rather than modifying the code directly when updating the API key.
Learn more about all possible custom parameters here.
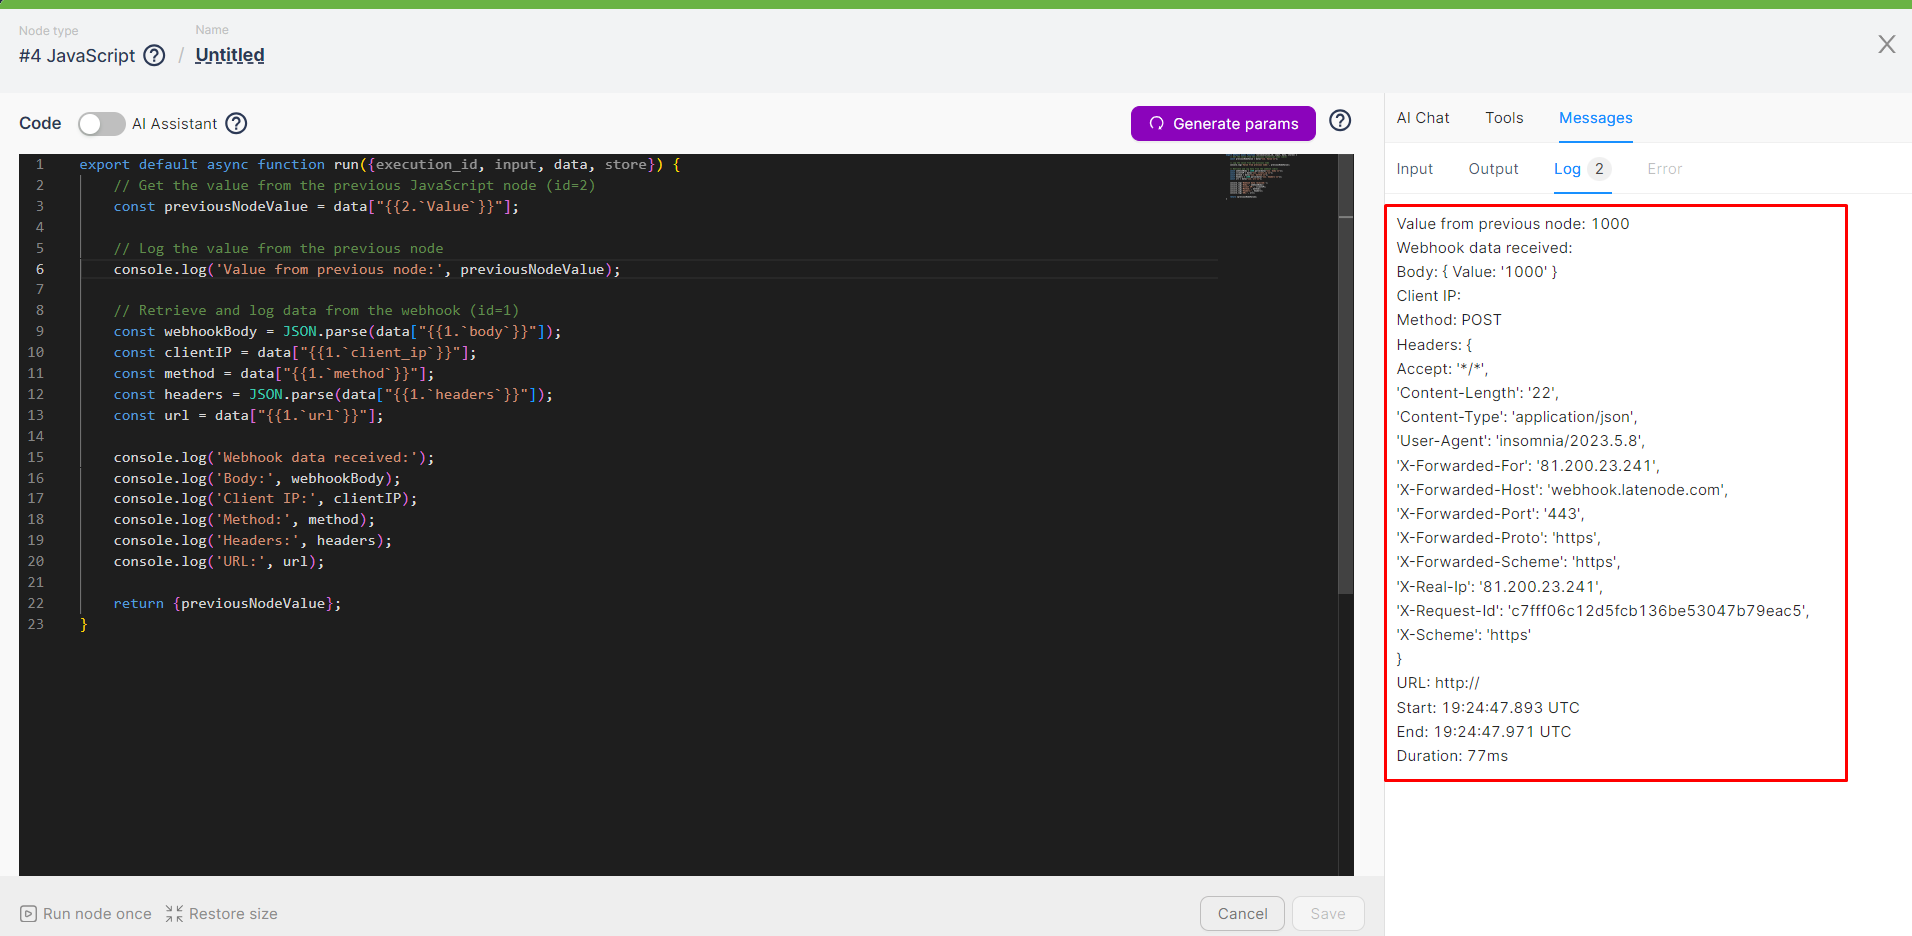
Logging
Logging in the JavaScript node is available using the console.log command. Logged data will be displayed in the Log tab.
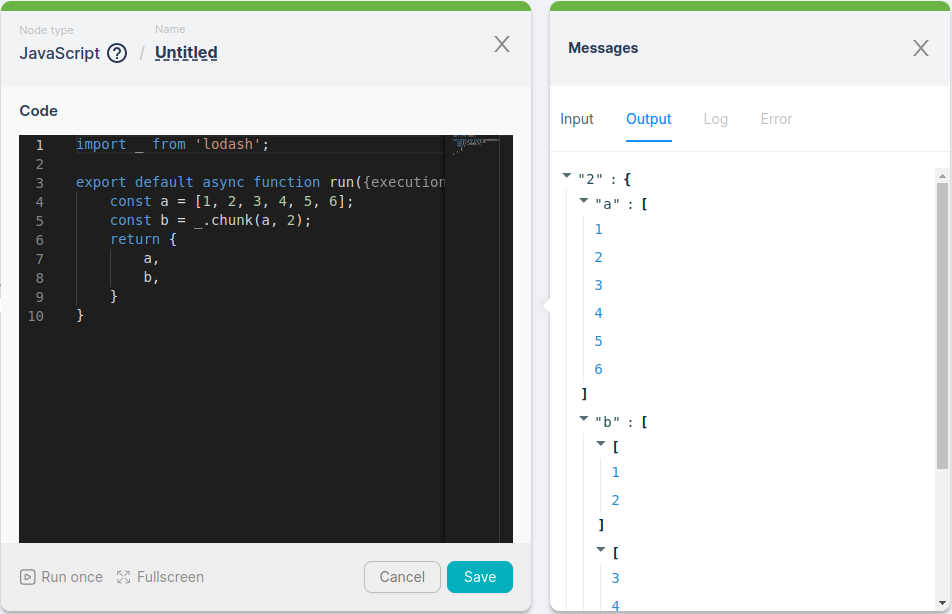
Using NPM Packages
The JavaScript node supports the import of npm libraries using the import statement. For example, importing and using the "lodash" library:
You can specify the version of the library you want to use with the @ symbol. For example:
import _ from '[email protected]';
import _ from 'axios@^1.2.0';
After each scenario with a JavaScript node is saved, a check is performed to see if there are any library imports and changes to the list of libraries and their versions (if specified):
- If there are changes, the libraries are installed.
- If there are no changes, the saved libraries and versions are used.
Library installation takes some time. If the user starts the node before the installation is complete, an error message will appear: "Dependency installation is not yet completed. Please try again in a few seconds." In this case, simply wait a short while before proceeding.
Node Package Manager (NPM) is a tool for developers working with Node.js, as it allows them to leverage a vast library of ready-made packages and easily manage project dependencies. Using the axios package enables developers to easily fetch data from external APIs or other web services without having to write extensive code for handling HTTP requests and responses.
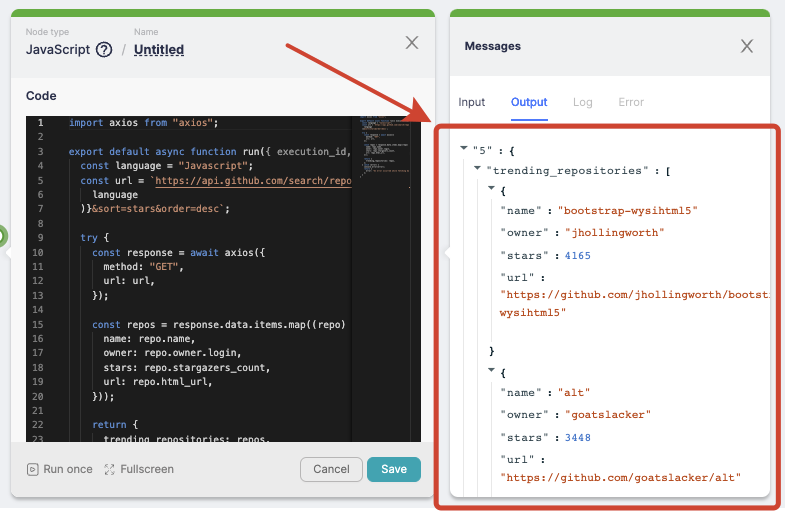
An example of such a scenario is fetching a list of current GitHub repositories based on a selected programming language using the axios package:
import axios from "axios";

export default async function run({ execution_id, input, data }) {
  const language = "Javascript";
  const url = \\`https://api.github.com/search/repositories?q=language:${encodeURIComponent(
    language
  )}&sort=stars&order=desc\\`;

  try {
    const response = await axios({
      method: "GET",
      url: url,
    });

    const repos = response.data.items.map((repo) => ({
      name: repo.name,
      owner: repo.owner.login,
      stars: repo.stargazers_count,
      url: repo.html_url,
    }));

    return {
      trending_repositories: repos,
    };
  } catch (error) {
    console.error(error);
    return {
      error: "An error occurred while fetching data from the GitHub API.",
    };
  }
}
Another example of using NPM packages is a scenario for calculating the time remaining until a deadline using the Moment package:
import moment from "moment";

export default async function run({ execution_id, input, data }) {
  const deadline = "25.10.2024"; // Retrieve deadline from input
  const now = moment(); // Get current time
  const deadlineMoment = moment(deadline, "DD.MM.YYYY"); // Parse deadline string to Moment object using custom format
  const remainingTime = deadlineMoment.from(now); // Calculate remaining time

  return {
    remainingTime
  };
}
JavaScript Node Limitations
The maximum execution time for the JavaScript node is 2 minutes.
You can add multiple JavaScript nodes to a scenario for sequential execution to handle more complex tasks.