08. How to create your own nodes
Scenario type “Nodul” is often used for quickly integrating into another scenario that involves preconfigured and repetitive actions.
Often a scenario of type Nodul is used to quickly embed an already customized and repetitive action into another, main scenario. The generated scenario of type Nodul is selectable in the list of all nodes and visually represents a customized node.
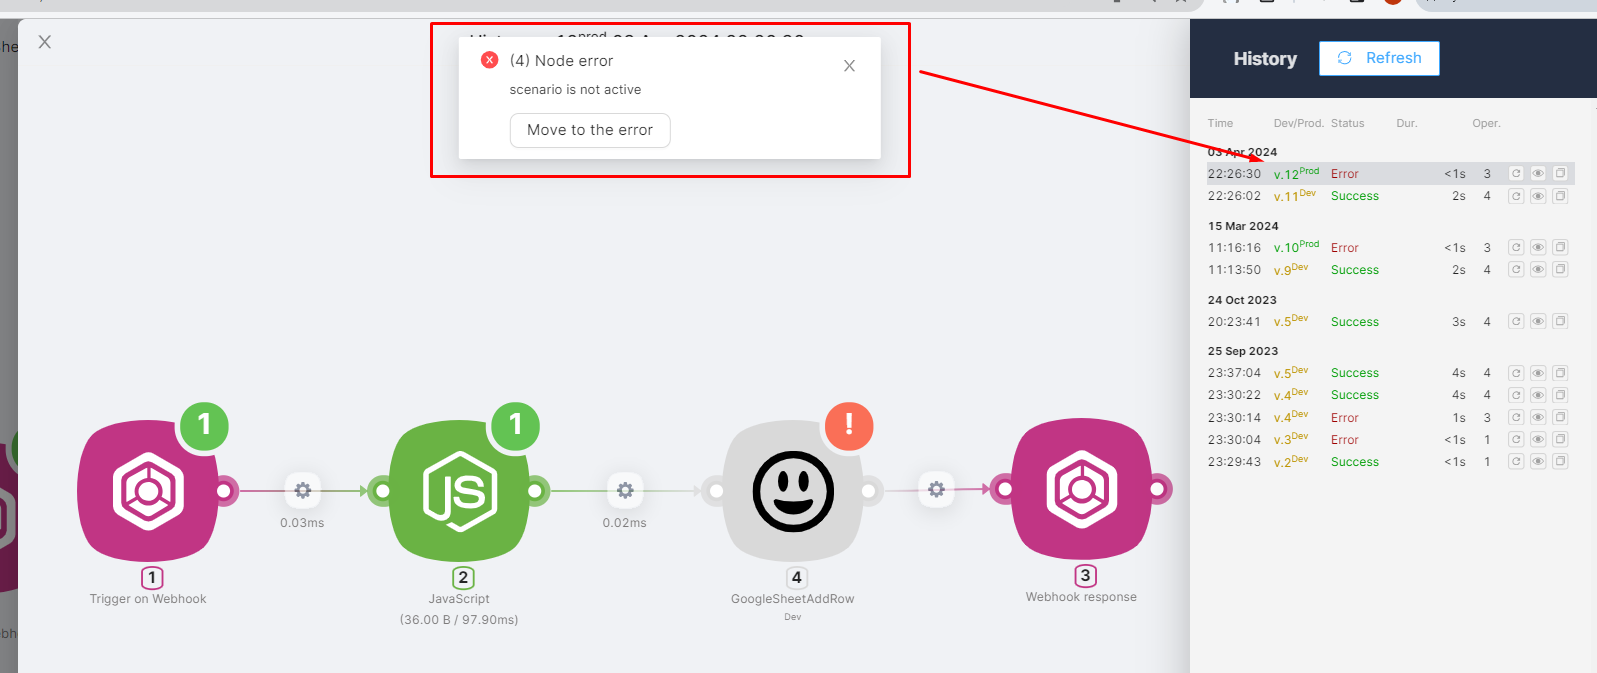
When executing Production-branch of the scenario that uses a scenario of type Nodul, the status of the scenario of type Nodul is important:
- If the status of the Nodul type scenario is Pause and the Trigger on Webhook node is the trigger for the main scenario, an error will occur during scenario execution indicating that the Nodul type scenario needs to be activated.
- If the status of the scenario is of the Nodul Pause type and the Trigger on RunOnce node is the trigger for the main scenario, no error will occur and the scenario will be executed.
- If the status of the scenario is of type Nodul Active, then no error will occur at any trigger of the main scenario and the scenario will be executed.
If the Development-branch of the scenario is running, no error will occur and the scenario will be executed.
Let's consider the algorithm for creating a Nodul scenario with an example.
We will create a scenario that records a string in a Google Sheet. Recording a string of text in a Google Sheet will be considered the repetitive action. Retrieving data from a source and transforming it, if necessary, will be considered the specific action.
To achieve this, you need to:
- Create a Scenario of type Scenario with the preliminary name "String to Table," the result of which is a frequently repeated action, i.e., entering information into a Google Sheet:
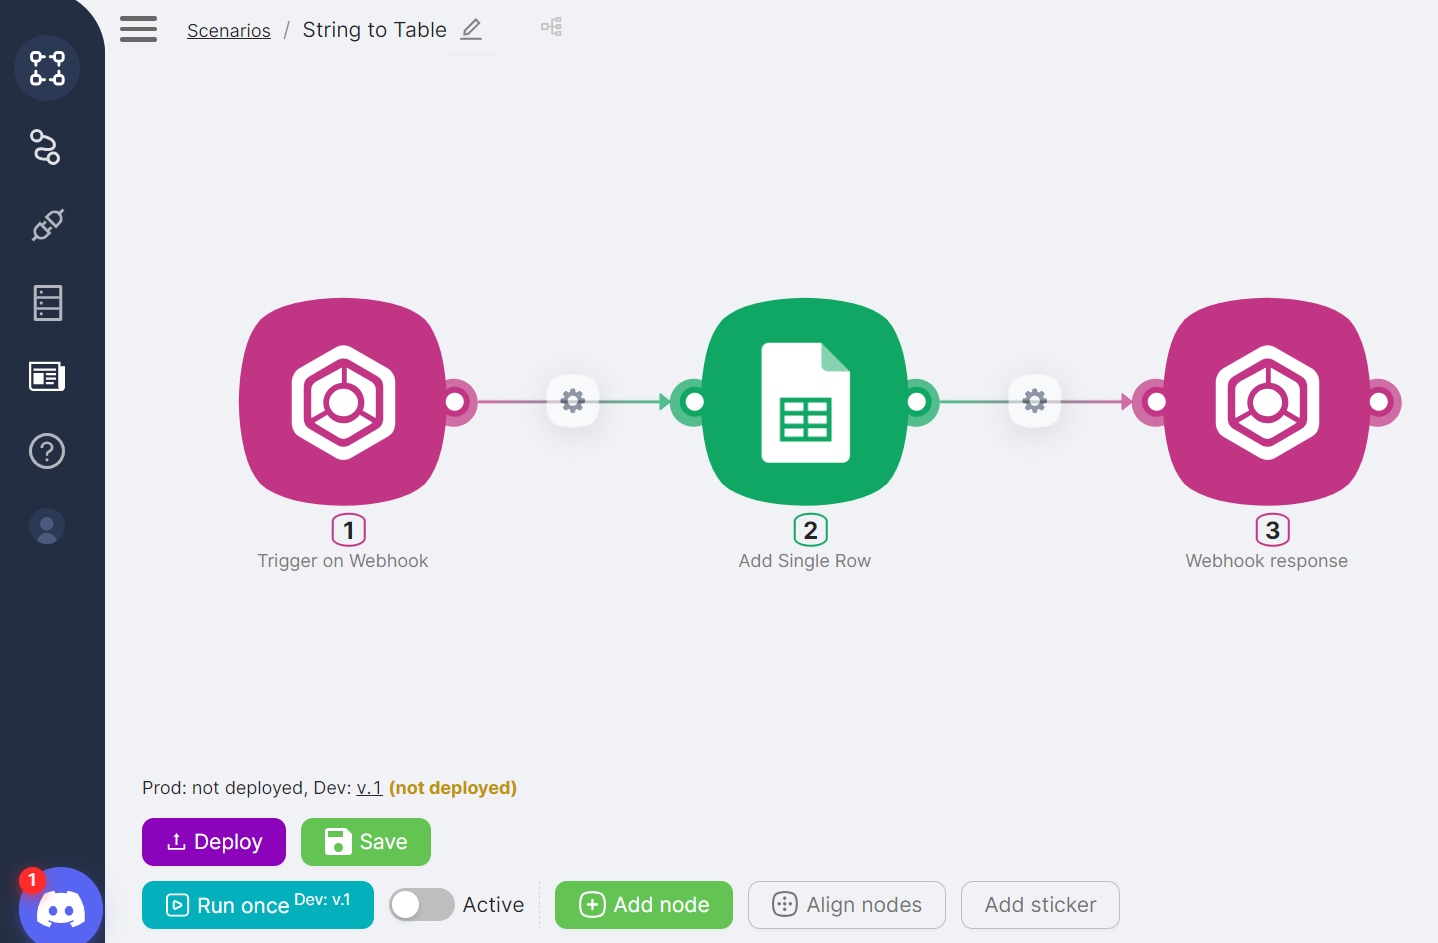
- Add a Trigger on Webhook node to trigger the scenario;
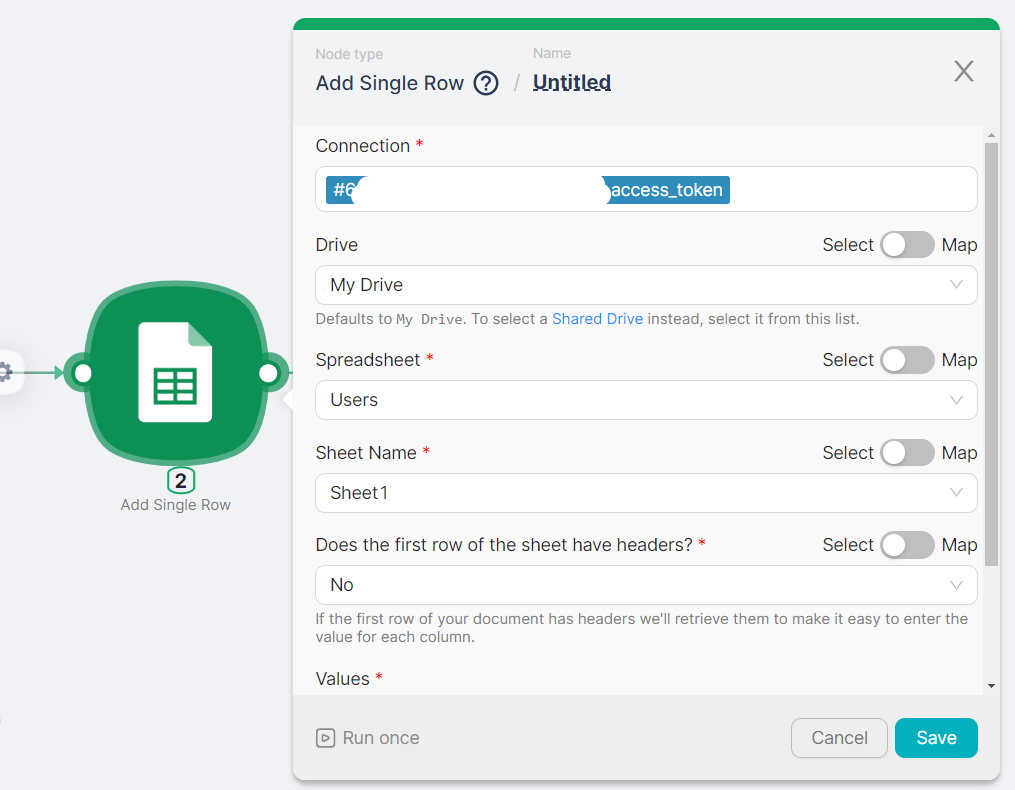
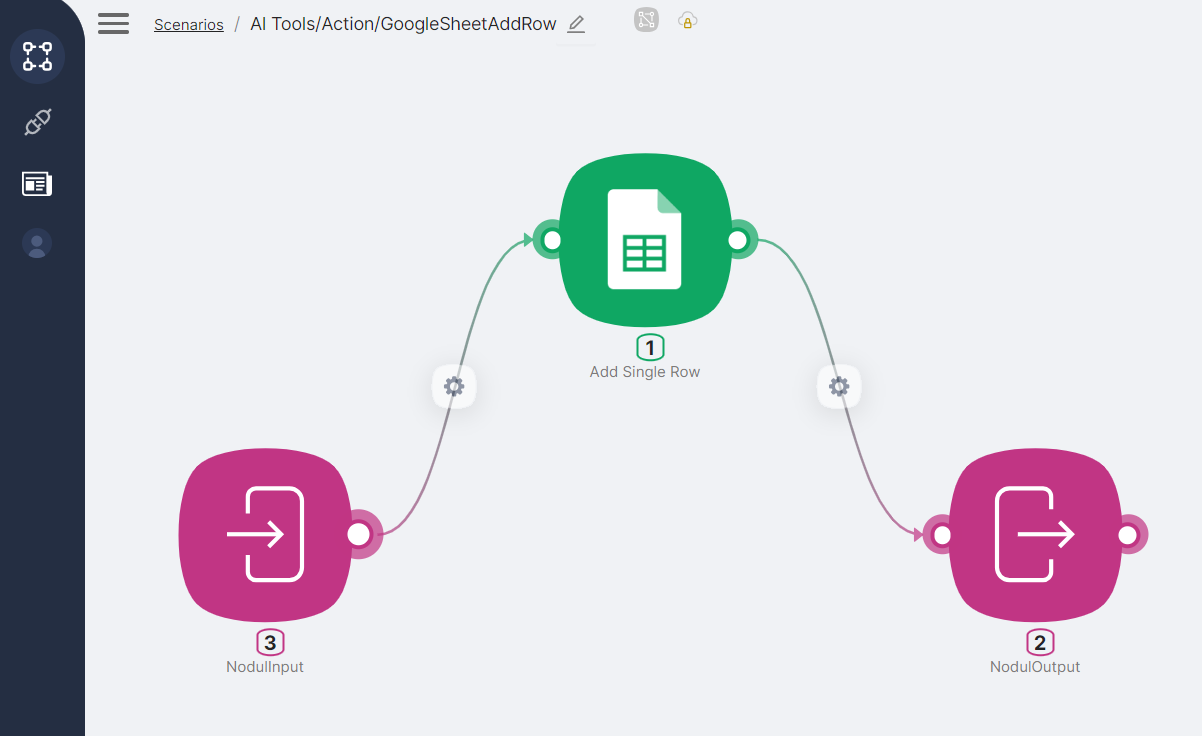
- Add an Add Single Row node to write a row to the Google Sheet according to your settings;
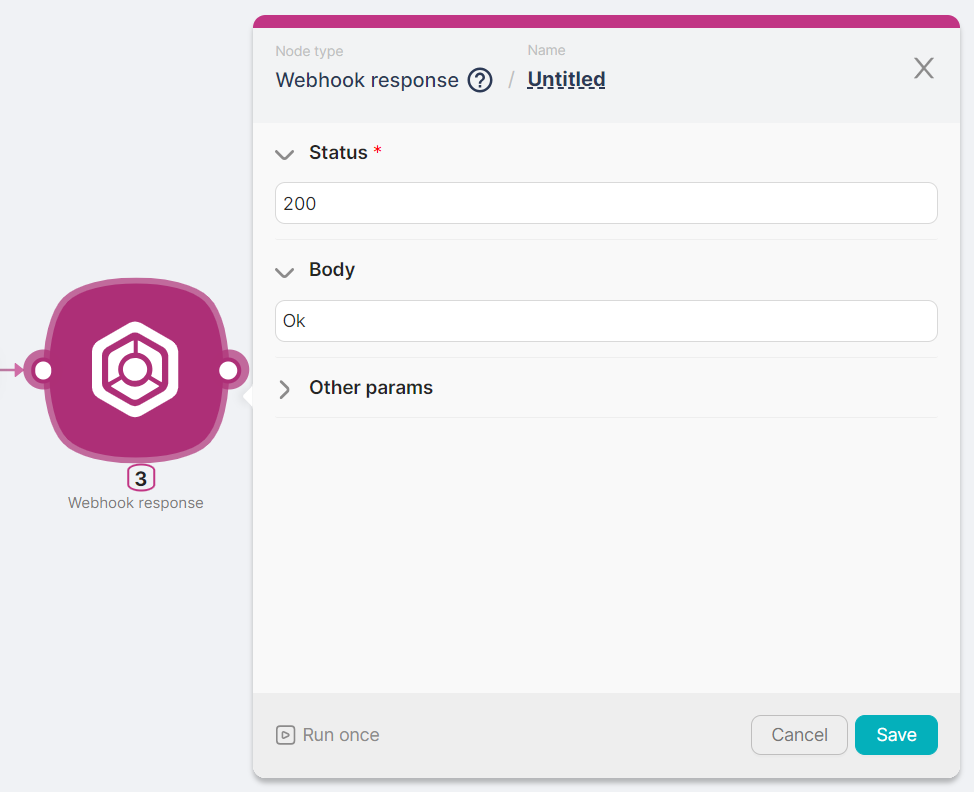
- Add a Webhook Response node to return a response upon scenario execution;
- Save and activate the scenario;
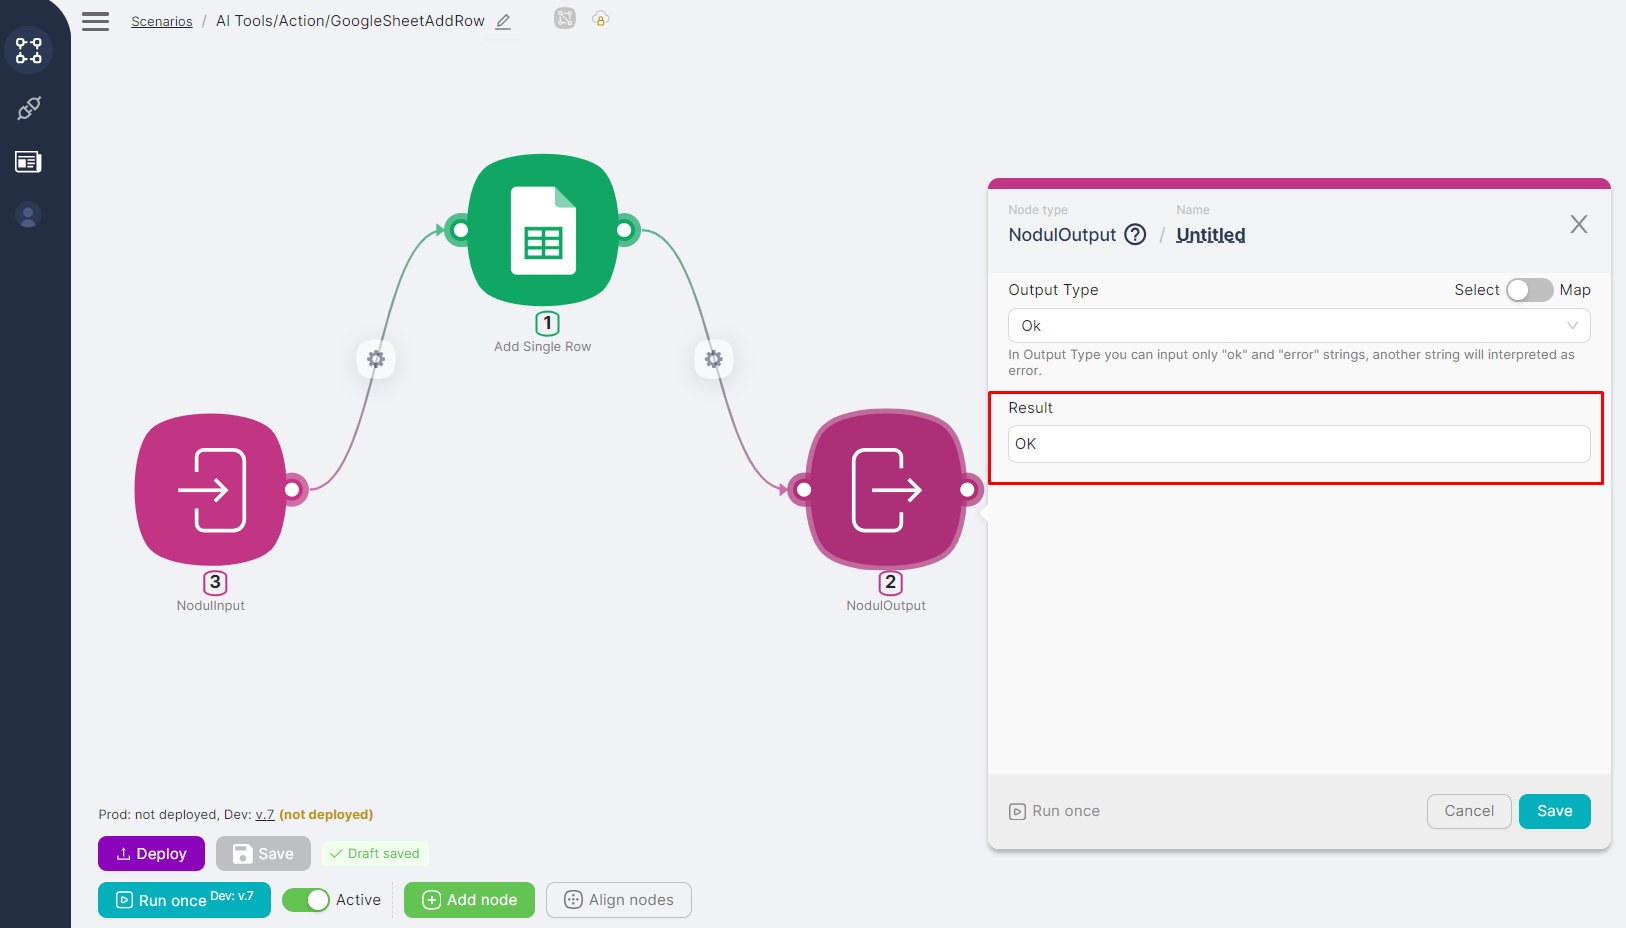
- In the "String to Table" scenario, replace the Trigger on Webhook node with a NodulInput node and replace the Webhook Response node with a NodulOutput node;
You can add XML code for the icon in the "Icon (svg)" field to make the scenario easier to identify.
- Change the current scenario name "String to Table" to "Al Tools/Action/GoogleSheetAddRow";

The "Al Tools/Action" part of the name is necessary for storing the scenario as an Action node in the Al Tools folder.
- Change the scenario type to Nodul;
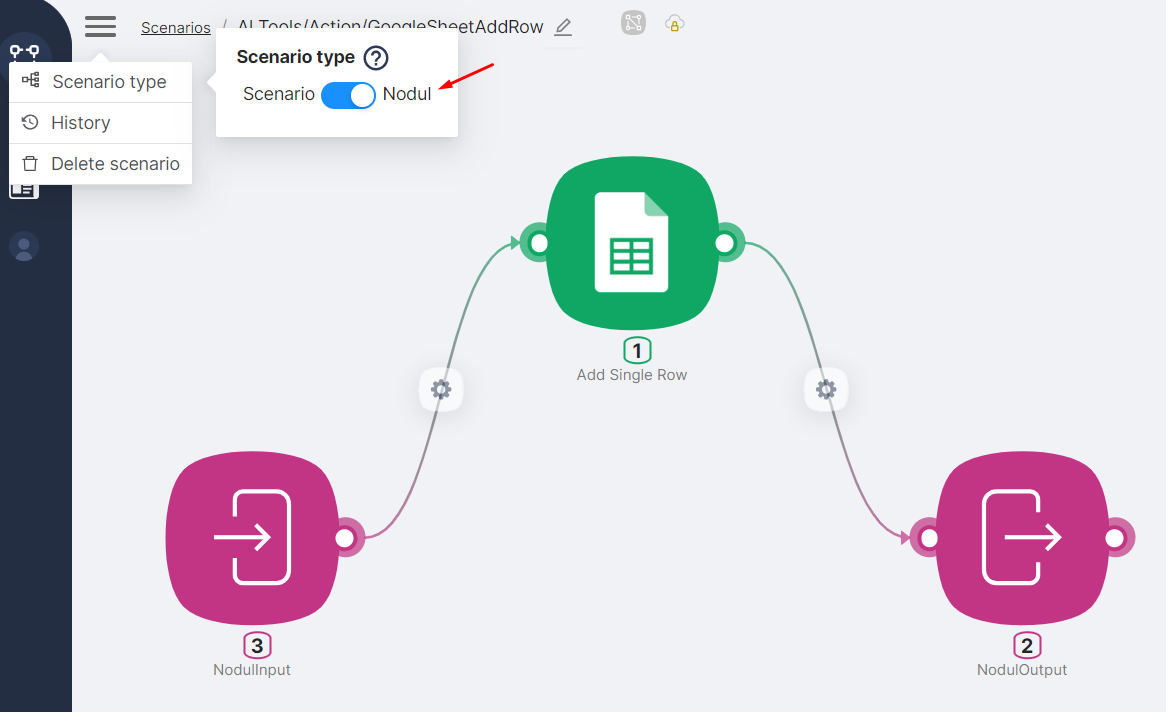
Next to the scenario name, after changing the type, icons are used to denote "Nodul" (a sign of a Nodul type scenario) and "Private" (indicating no public access to the scenario).

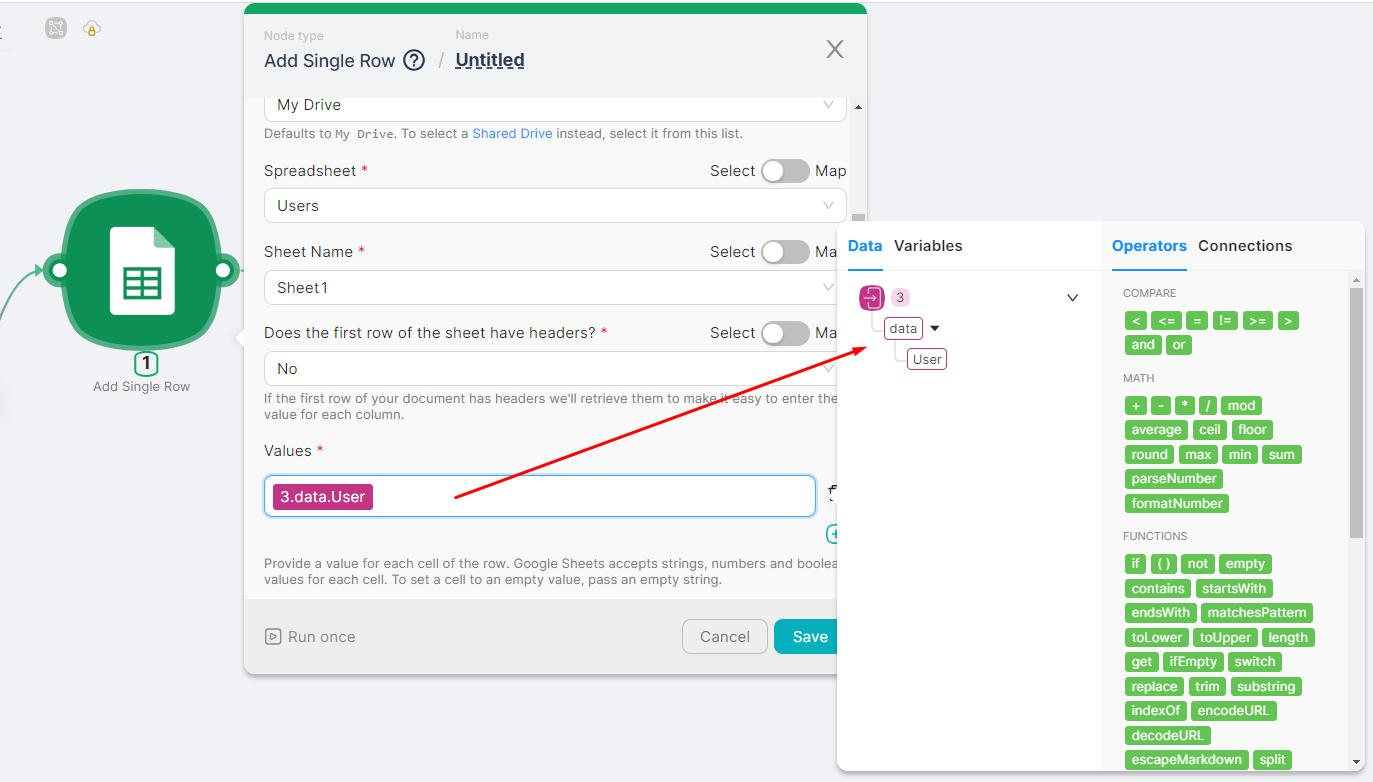
5. Add a parameter to the NodulInput node, for example, User - a text string. You can add parameters using the "Add Parameter" button.

6. Adjust the settings of the Add Single Row node so that the text added to the table row is equal to the value of the User parameter in the NodulInput node.
7. Add the execution result of the "Ok" scenario to the Result field of the NodulOutput node;
- Create a scenario of type Scenario with the name "Get and Write Users," where the result of execution involves retrieving user data, transforming it, and writing the username to a Google Sheet.
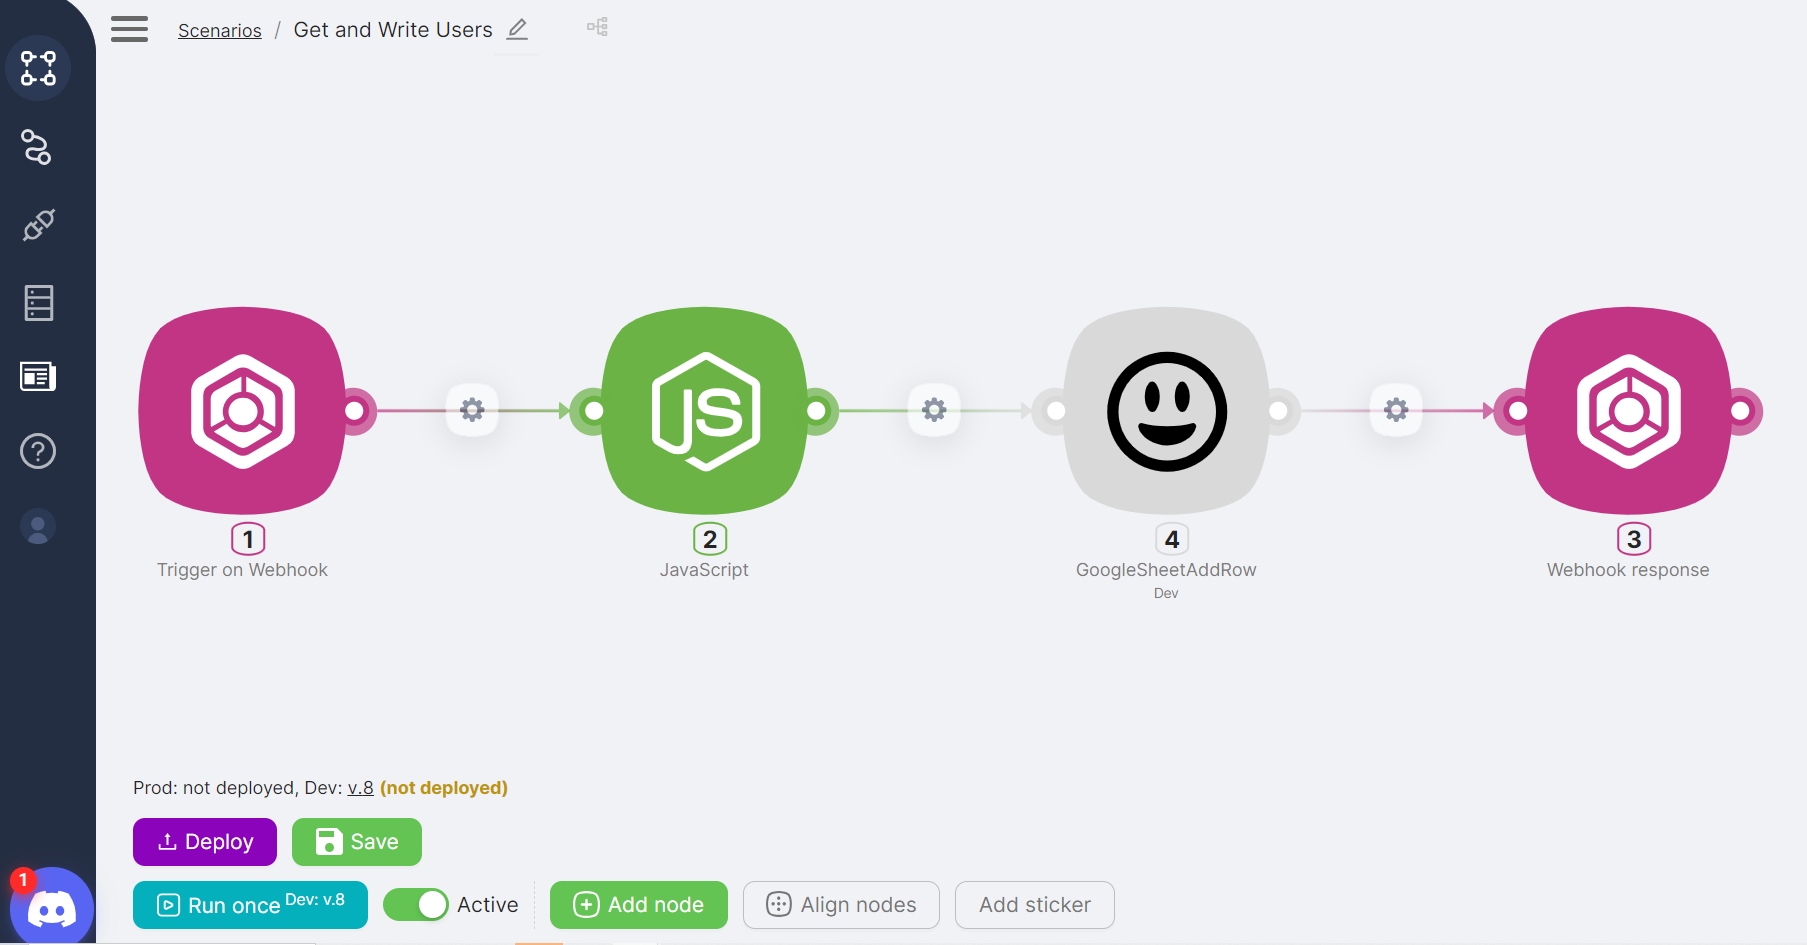
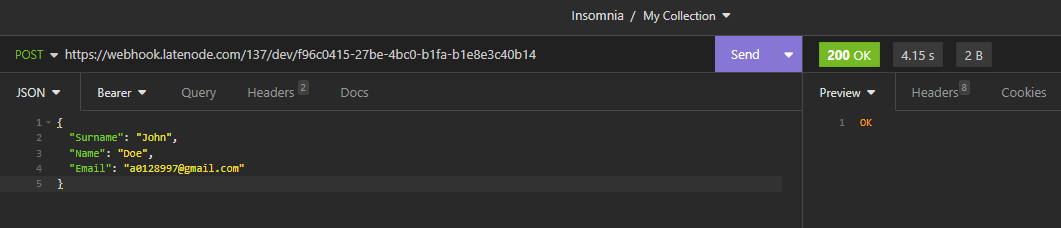
- Add a Trigger on Webhook node to trigger the "Get and Write Users" scenario and pass JSON with user data into it:
{
	"Surname": "John",
	"Name": "Doe",
	"Email": "[email protected]"
}
- Add a JavaScript node to create the full user name based on the data received in the Webhook using code:
export default async function run({execution_id, input, data}) {

const SurName = data["{{1.body.Surname}}"];
const Name = data["{{1.body.Name}}"];
const FullName = Name +' '+ SurName;

    return {
      FullName
    }
}

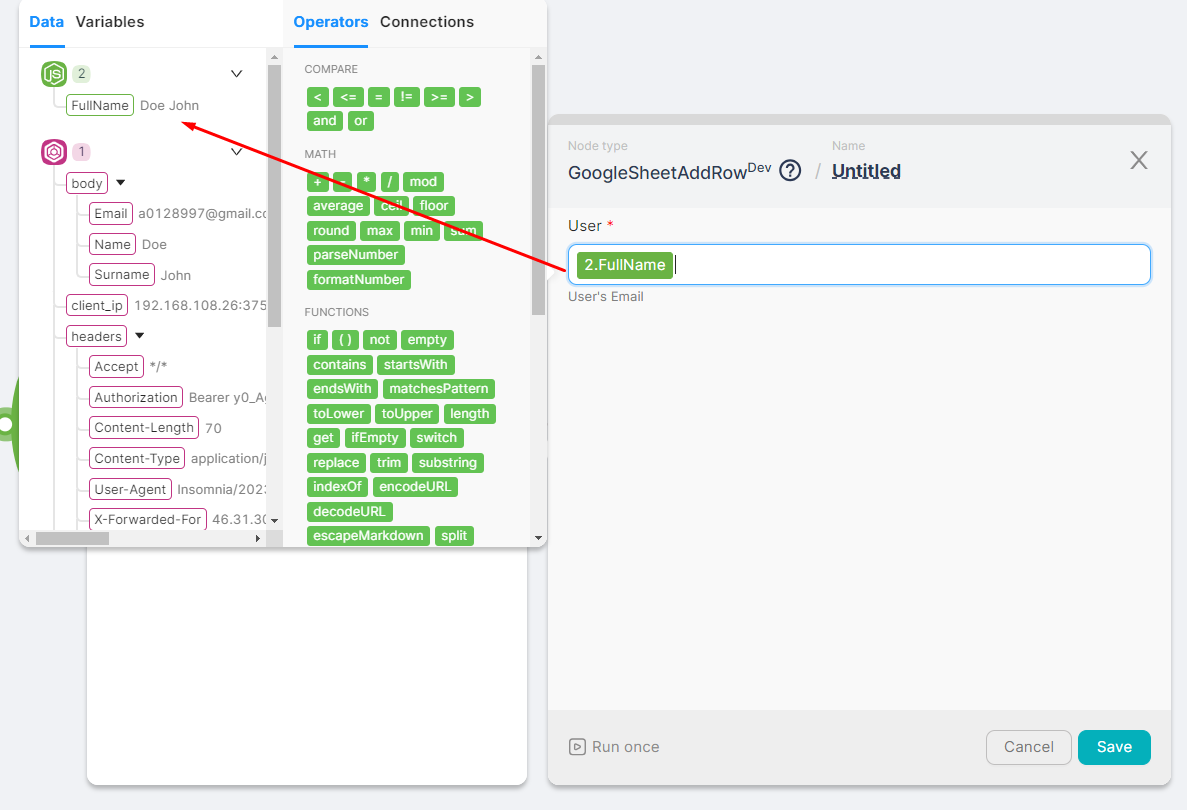
- Add a GoogleSheetAddRow node (Nodul type scenario) to write the full user name obtained in the JavaScript node into a Google Sheet;
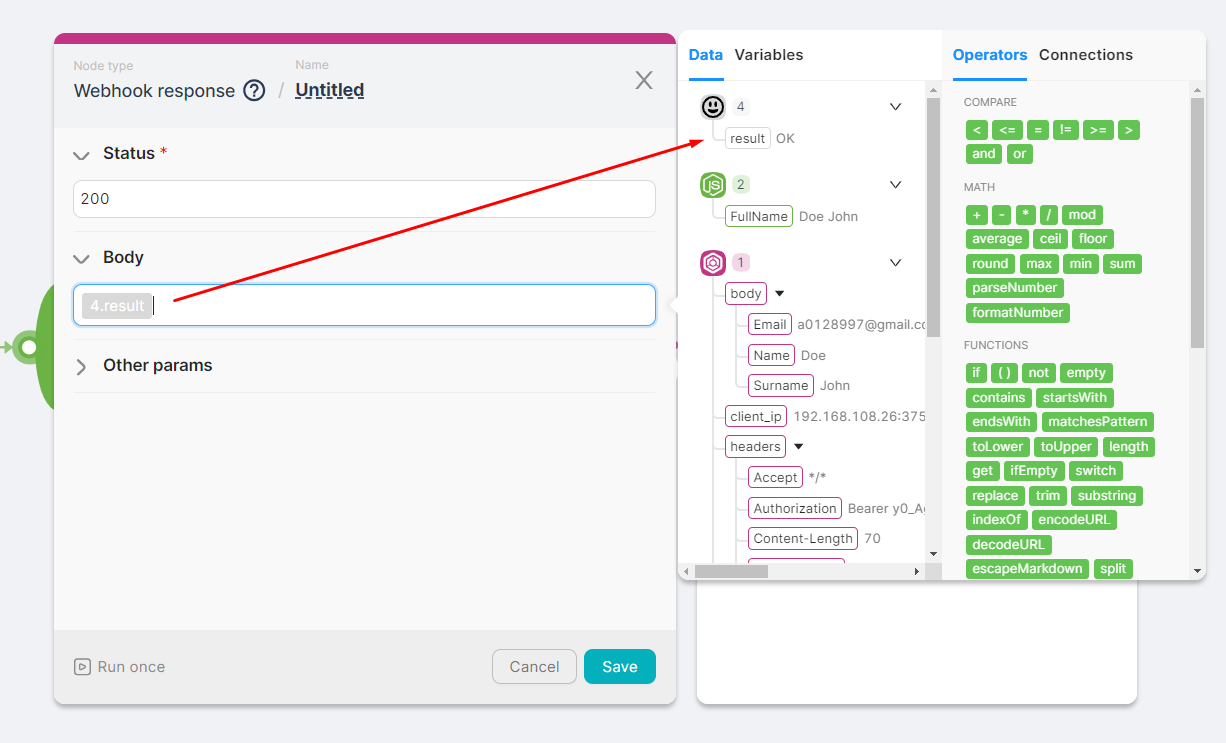
- Add a Webhook response node to receive a response from the GoogleSheetAddRow node indicating successful execution.
- Save and activate the scenario.
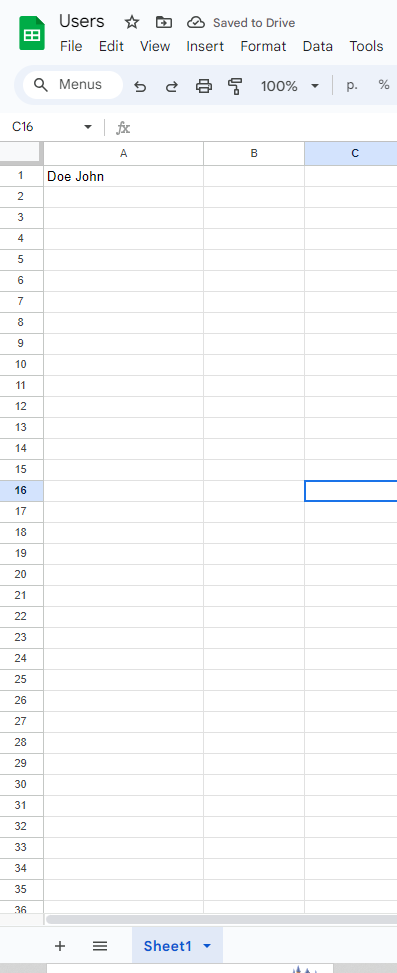
The result of the scenario is the recording of a row in a Google Sheet and a successful row recording response.
In the future, if user information comes from new sources or requires different processing, the GoogleSheetAddRow node can be reused without reconfiguring the logic for recording rows in Google Sheets.