12.01.6 Using a Wait node to send Telegram messages sequentially
As an example of using the Wait node, let's create a scenario that results in the sequential sending of two pre-known messages. To successfully execute the scenario, several nodes need to be added:
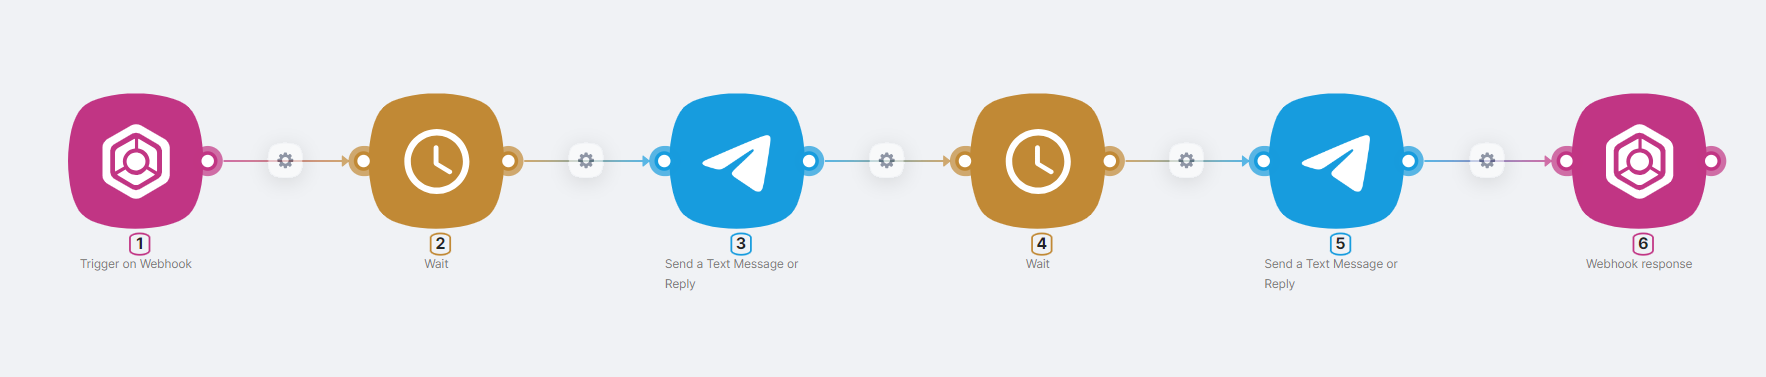
- (1) Trigger on Webhook node, to trigger the scenario and receive data via POST about two messages and the date of sending the first message;
{
	"Date": "2023-12-26T14:15:00Z",
	"Message1": "Message to be sent at a specified time",
	"Message2": "Second message to be sent after a period of time after the first"
}
- (2) Wait node, to configure the time of sending the first message. The Date and Time field can be set to the
Dateparameter passed to the Webhook node. To fill in the field with a parameter from the previous node, switch the input format to Substitution;

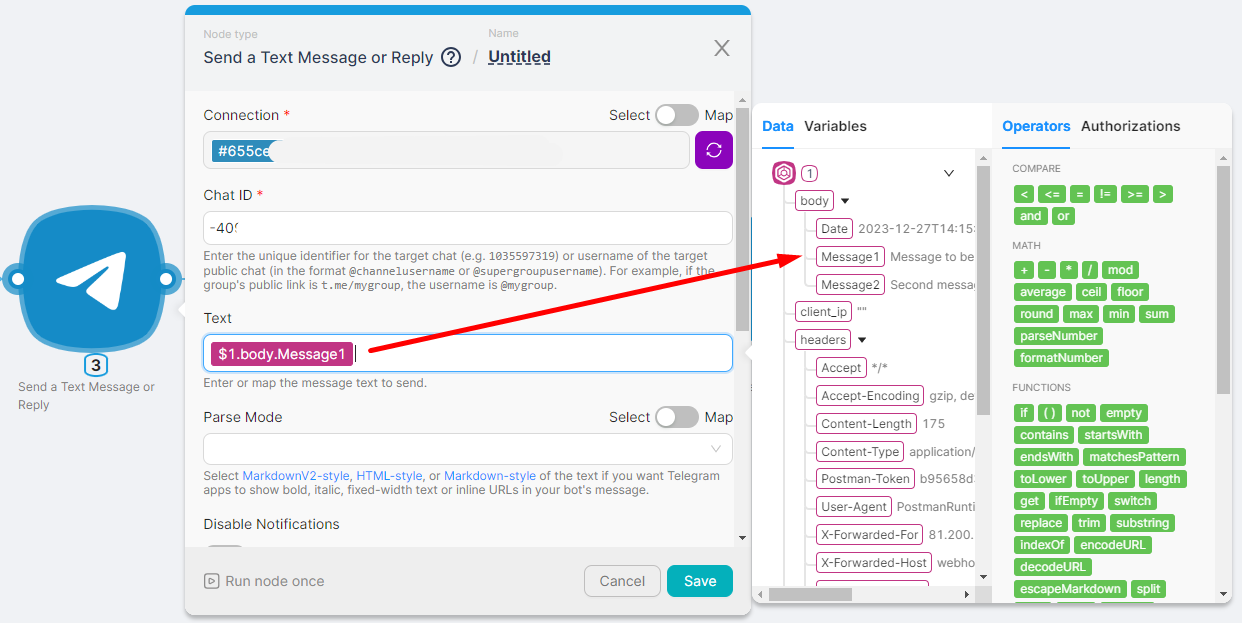
- (3) Send a Text Message or Reply node, to send the first message to the Telegram chat. The Text field can be set to the
Message1parameter passed to the Webhook node;
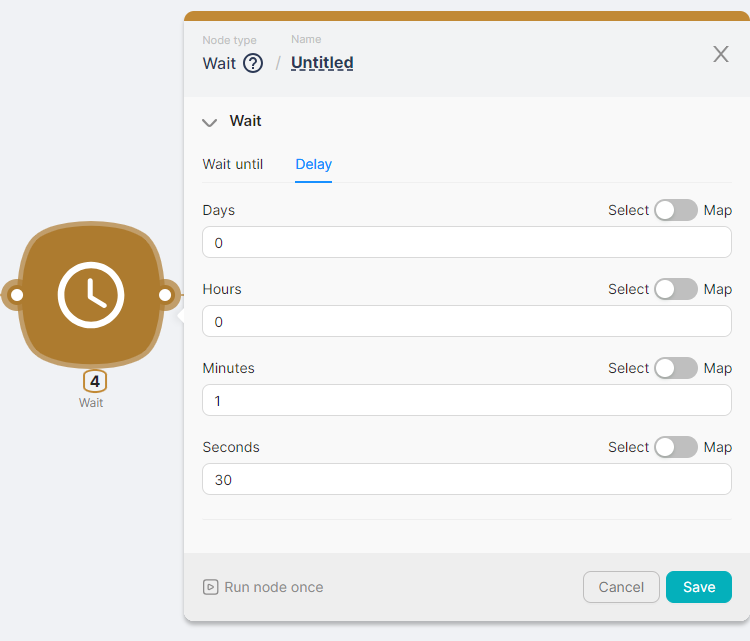
- (4) Wait node, to configure the time of sending the second message. The second message can be sent, for example, 1 minute and 30 seconds after sending the first message;
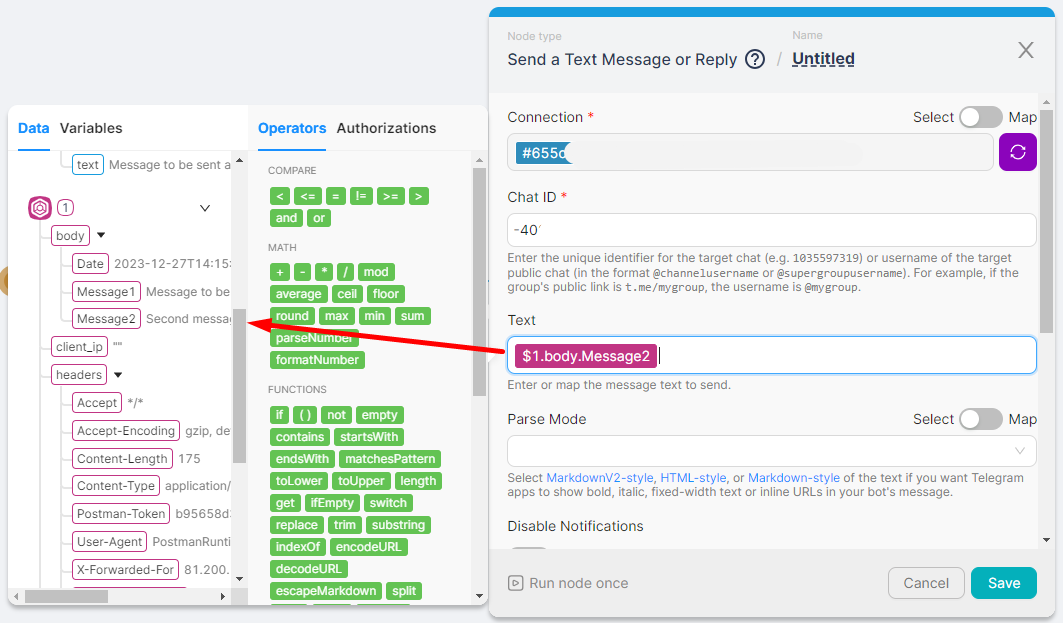
- (5) Send a Text Message or Reply node, for sending the second message to the Telegram chat. The Text field can be set to the
Message2parameter passed to the Webhook node;
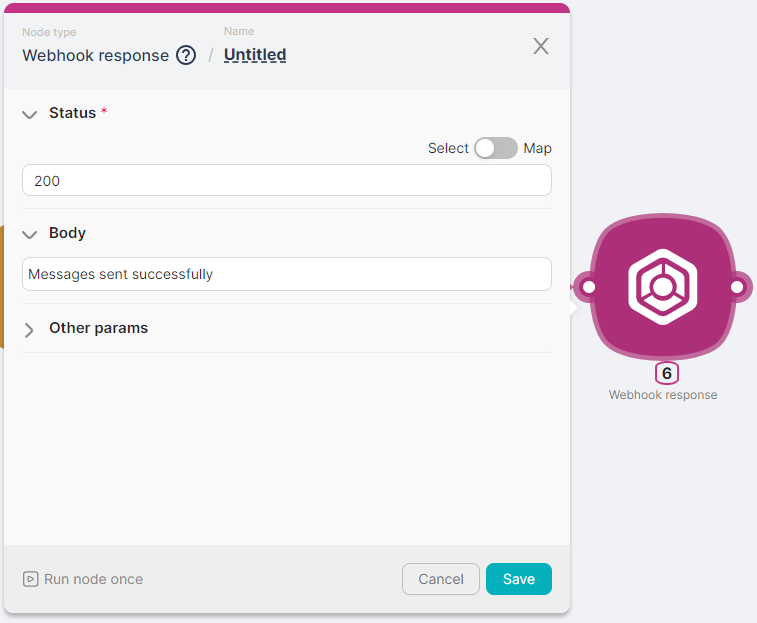
- (6) Webhook response node, for sending a message about the successful execution of the scenario.
The result of executing the scenario includes:
- Messages in the Telegram chat sent according to the settings of the Wait nodes;

- A response generated by the Webhook response node;

tip
During the waiting period configured by the Wait node, the scenario is in a Pause status.
